

In Cub Scouts, one exciting achievement is earning your whittling chip. The kids cannot wait until they can learn how to use a pocketknife and earn their badge saying they can use them. Oh, the excitement of taking a stick and whittling the end. So, you may wonder what pocketknives and soap carving have to do with one another.
Well, here’s the thing. Many parents kind of freak out about their kids using pocketknives at eight years old. It is one of those rites of passage, though, for a Cub Scout.
Now kids are certainly not handed a knife and some wood, and off they go. Noooo. They need to learn the safety rules of pocketknives and learn to use them BEFORE they can have them.
Do you know how the kids learn to whittle?
They whittle a bar of soap.
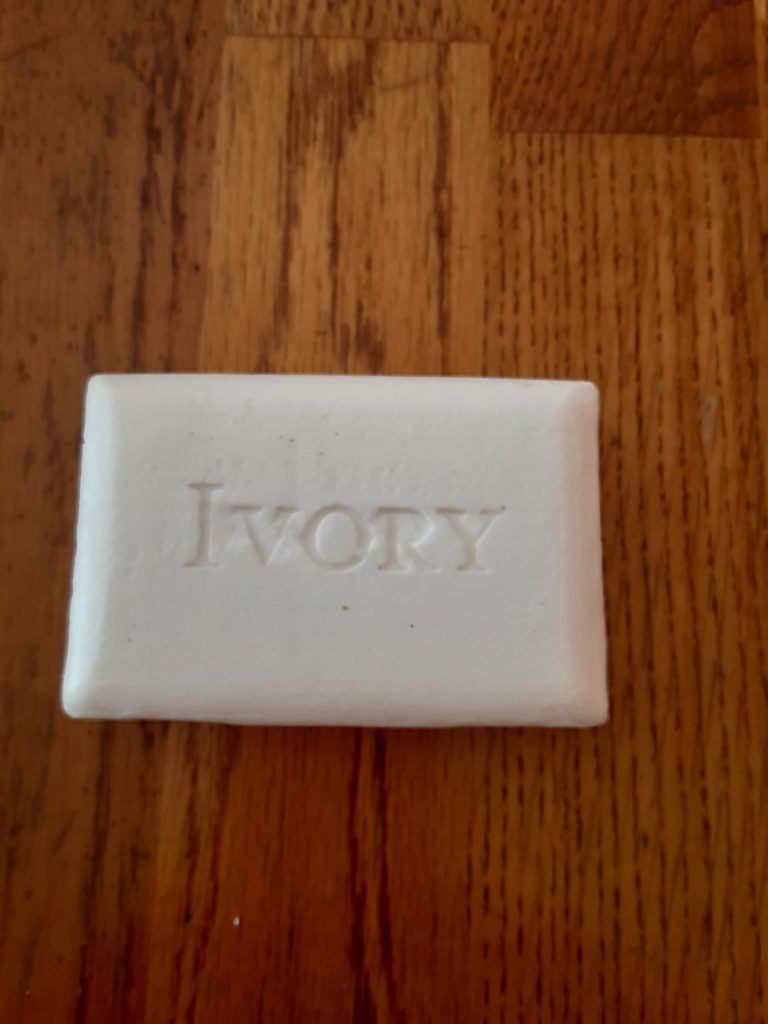
Yup, you read that correctly. The little scouts practice their knife skills with a bar of Ivory soap.
However, you don’t need to be a Cub Scout or even use a pocket knife to have some fun carving soap. Any kiddo can whittle soap with much simpler tools.

Table of Contents
Why Would You Carve Soap?
So, why would kids want to carve soap?
Well, carving soap is fun. Kids can have fun shaping their soap and adding intricate details, too. After, they have a bar of soap that is unique and something they can proudly show off.
Soap carving can also make cute gifts for family members. Kids can make special carvings all on their own.
You can also use soap carving in your homeschool. Soap carving would be great for:
- art time
- create historical artifacts
- carve landforms for geography
- make items for a book project
It is a great way to add some fun to your homeschool. If you’d like more ideas for adding fun to your homeschool, check out Super Sites for Adding Fun to Your Homeschool. and How and Why to Include Fud in Your Homeschool.
Soap Carving
So, let’s get started. Carving soap doesn’t need complicated tools. It is really pretty simple.
Materials:

- Bar of Ivory Soap
- Wooden Cuticle Sticks
- Pattern (optional but helpful)
Directions:
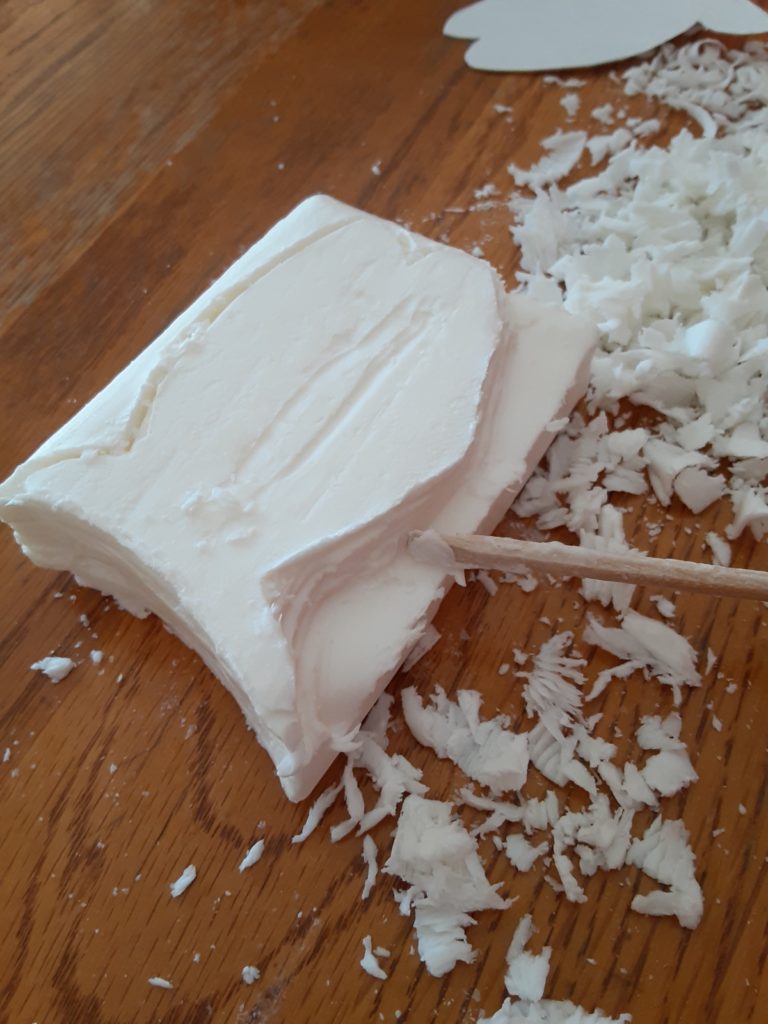
- Unwrap the bar of soap a few days before you want to make soap carvings. I have let mine dry out for as little as 2 1/2 to 3 days, which worked fine. Ivory soap works great for carving but works even better if it has had time to dry out. It won’t be as messy, and it will carve easier. Others have tried different types of soap, but some are much harsher smelling and may bother some people while trying to carve. Also, some bars of soap aren’t flat; they are rounded.
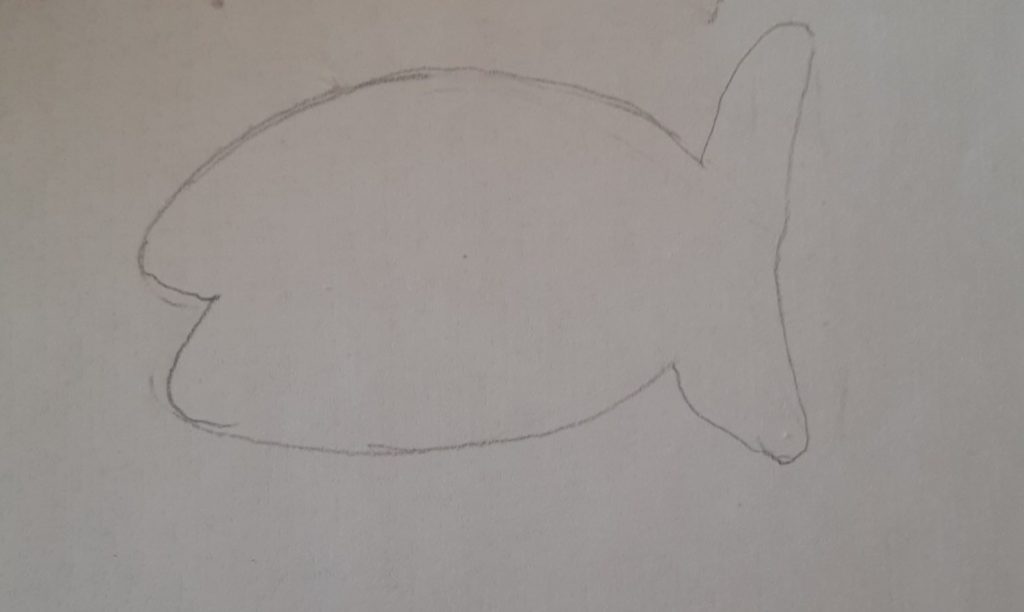
- Decide what to carve. I highly recommend beginners use patterns. If you search Cub Scout soap carving patterns, you will find plenty of designs.
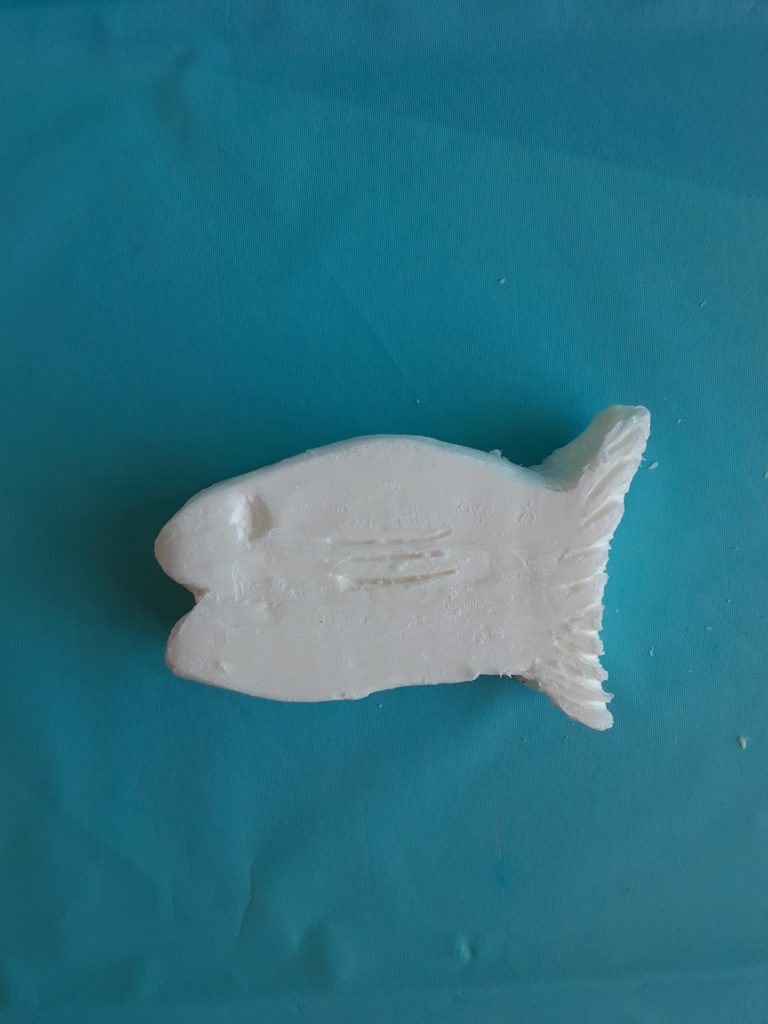
You can also draw a pattern on a piece of paper and cut it out. This is what I did. I did a little fish since it is simple.
- Get out your cuticle sticks. You can find them in the beauty section and get a pack of them for cheap. I think Target sells a pack of twelve for less than $2. These work well because they have an angled point that is great for carving.
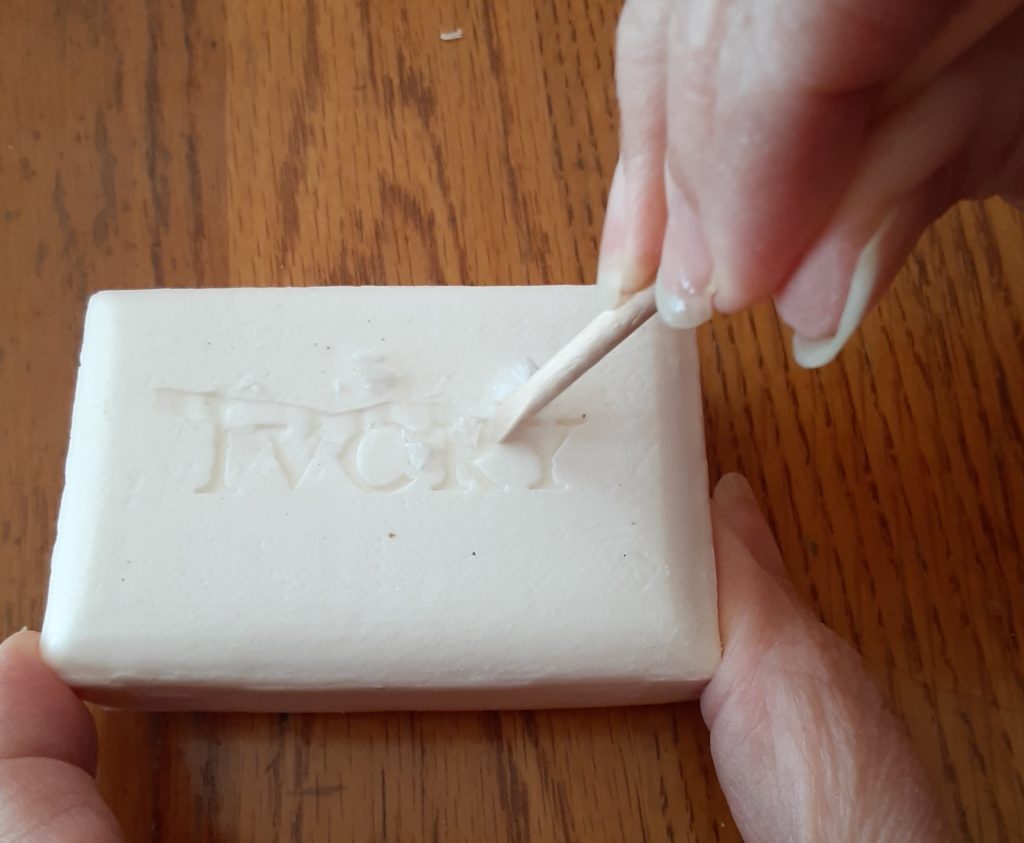
You will want to start by scraping off the words. Take your cuticle stick and gently scrape it across the top to remove them. Kids may want to slowly move across the top of the bar from one side to the other, so you keep a flat surface.
- Begin to carve. Once the writing is removed from the top, it is time to get started. Kids will want to lay their pattern on the soap. Using the point of their cuticle stick, they will trace around their shape, digging into the soap.


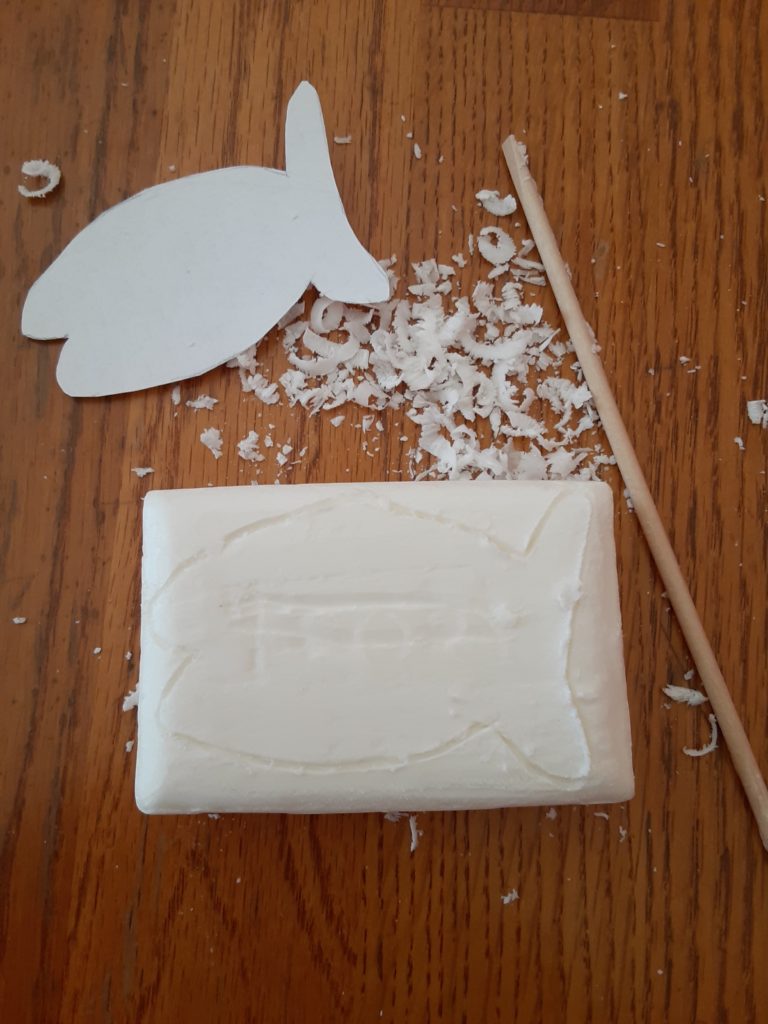
There will probably be extra soap around the edges. You need to slowly whittle it away with the cuticle stick until you have the outer shape.

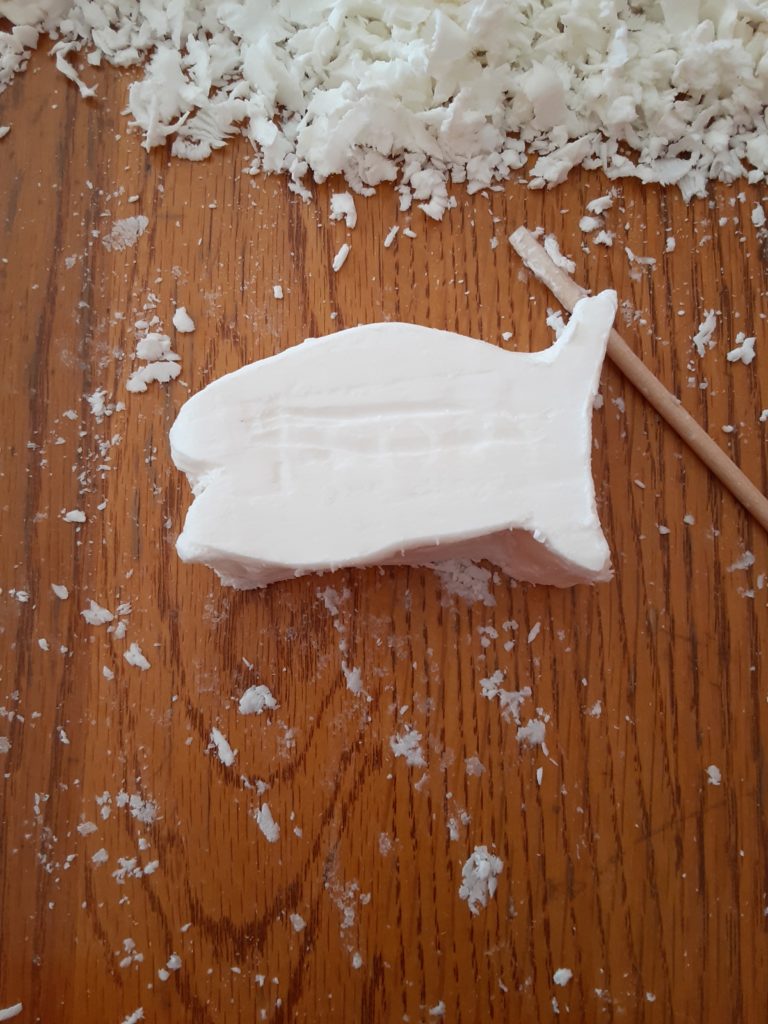
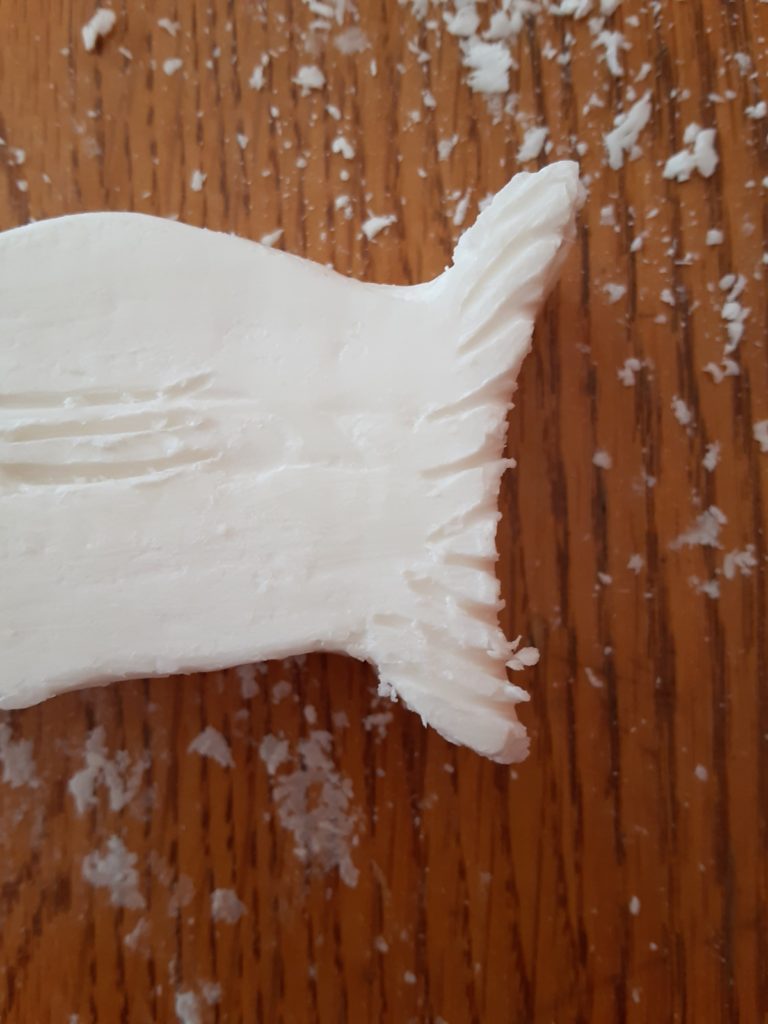
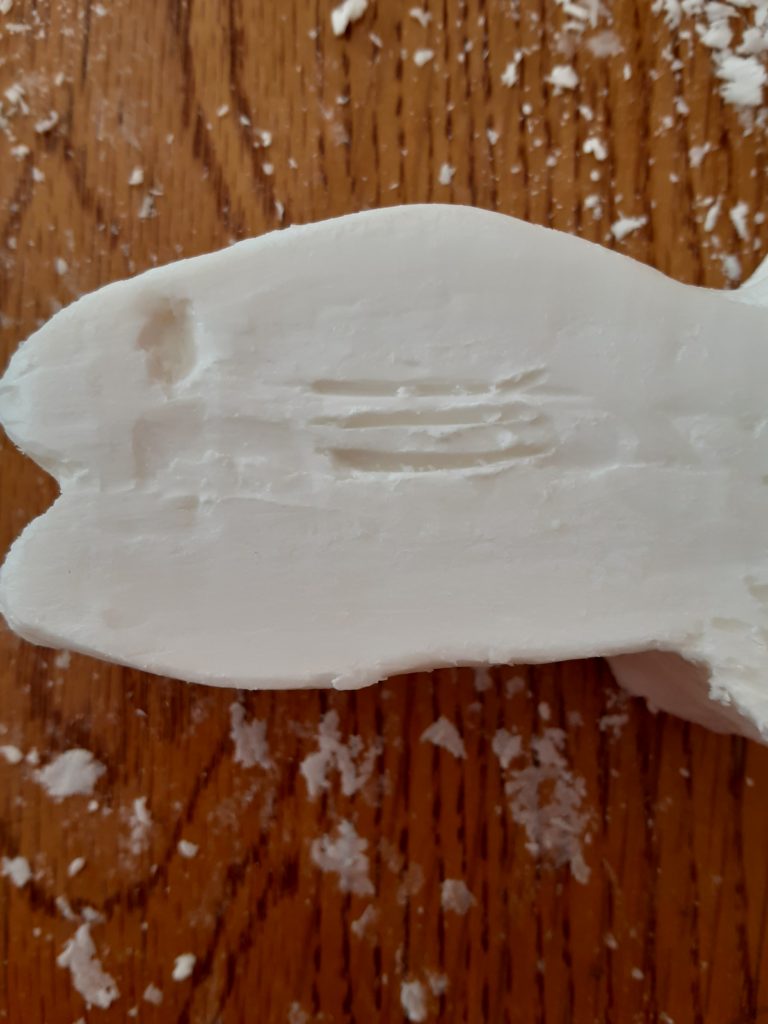
- Add the details. Once you have carved the general shape, it is time to add the details. Again, encourage the kiddos to take their time and work carefully.
Another Tip
One recommendation I’ve seen is using plastic knives for carving. My hesitation with that is they are usually serrated, which will leave grooves. However, plastic knives you use with Play-Doh and clay tend to be smooth, so it may work. I haven’t tried it, so I can’t say for sure.
Skills Gained from Soap Carving
Soap carving works on creativity, patience, and attention to detail.
It is quite interesting working with eight-year-old kiddos on working slowly and meticulously. I had mostly boys at the time, and they wanted to hack large chunks off in one swoop (and they were using pocketknives, not wooden tools). My own son learned the hard way and took a whole toe off his bear claw carving.

Funny thing, my kiddos were all safe and had no injuries. The parents, on the other hand…One cut himself cleaning off the knife.
The point is that soap carving takes careful work and attention to detail, which is a great way to teach kids to slow down and take their time to do something right.
Overall, soap carving is fairly simple. You can use it in your homeschool, for kid-made gifts, or as a fun activity to beat boredom.
Get some soap and cuticle sticks, and let the creativity flow. Kids will have a lot of fun carving. Make sure to have lots of bars of soap ready to go because once they carve one bar, they will want to get started on another. Trust me, I’ve been there.
Do you want more soap fun? You might like Soap Making with Kids. Check it out.
Happy Homeschooling!

I’m a Grandma raising my 7 year old grandson. I’ve homeschooled him for first grade,just started second grade. Need all the help and ideas I can get! This has been an idea since last year,but he’s ready for it now. He wants a pocketknife,he says when he’s ten. We’ll see. Soap carving 101 here we come!
Have fun! I hope this helps. Soap is such a good tool for teaching kiddos how to use pocketknives safely. I hope you have a great homeschool year.
[…] 2/27 International Polar Bear Day – Fun craft alert! Fork Painted Polar Bear it’s the cutest! Another crafty idea is to whittle a polar bear from a bar of soap. My friend at The Secret Life of Homeschoolers has a great soap carving post! […]
[…] need are a couple of basic materials. First, of course, is a soft soap, such as Ivory soap, which is ideal for its texture and ease of workability. You’ll also need to get some popsicle sticks […]