This post contains affiliate links. By clicking on the link and making a purchase, I may receive a small compensation at no extra cost to you. I only promote products that we love and use in our homeschool. Please click here for full details on my Disclosure Policy.
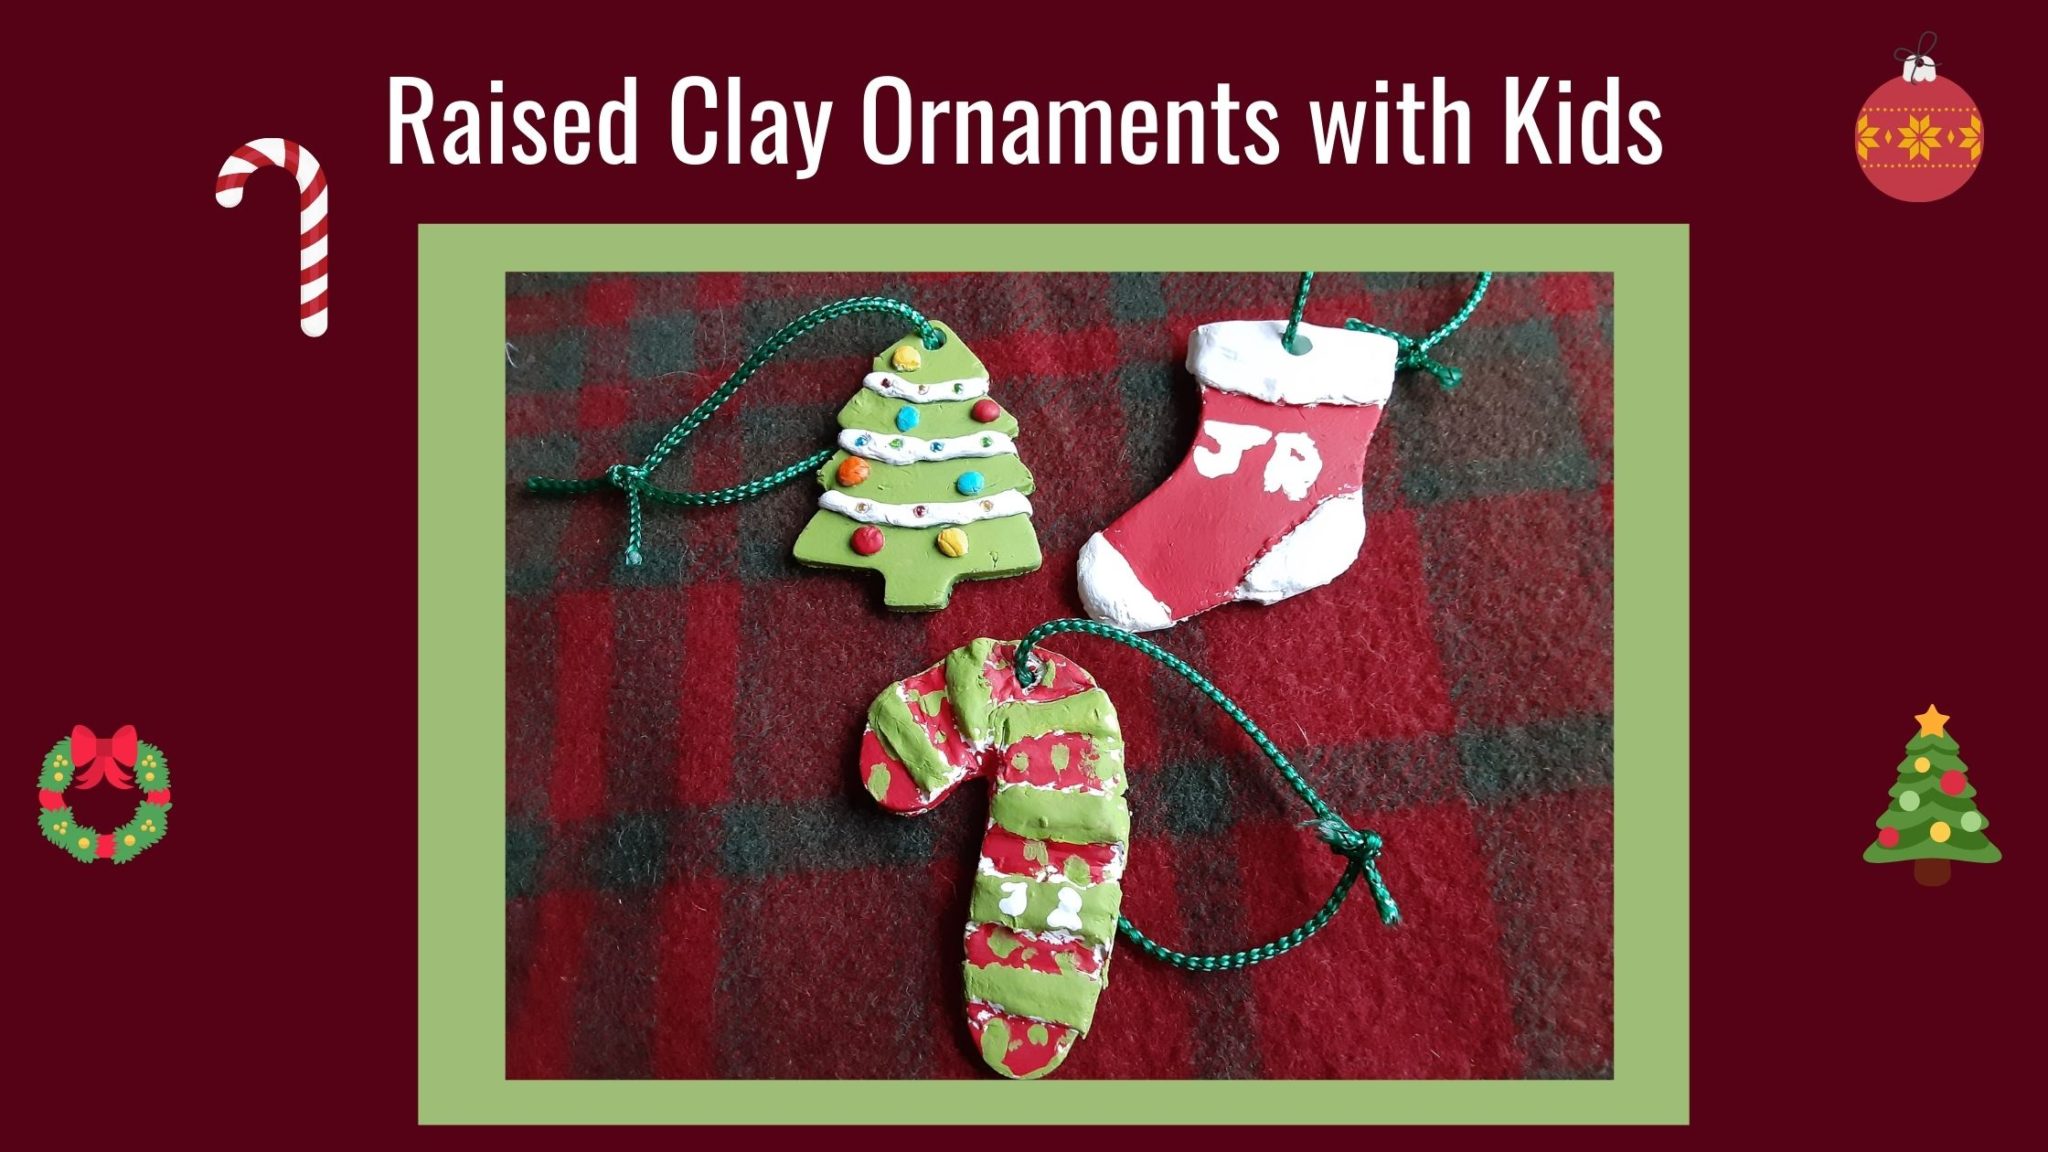
One thing I love doing each year is finding a new ornament for the kids to make and add to our Christmas tree. It is nice looking at the tree and reminiscing about the time we made a particular ornament and the memories attached to it. This year I wanted to add some raised clay ornaments.
Over the years, we’ve made gingerbread smelling ornaments and salt dough ornaments. I just love the look of white clay, though, and wanted to do something with it. So, I decided making some raised clay ornaments would be fun even for older kiddos.
These ornaments are easy to make and even more fun to paint. You can get as creative as you want or keep it simple. Take a look.

Raised Clay Ornaments
I will keep these ornaments simple and let you take it from there. I give suggestions along the way.
Materials:
- White clay (air dry or oven bake)
- Rolling pin
- Cookie cutters
- Plastic knife
- Straw (optional, but helpful)
- Acrylic paint
- Paintbrushes
- Ribbon or yarn to hang the ornaments
Step-by-Step Instructions for Clay Ornaments:
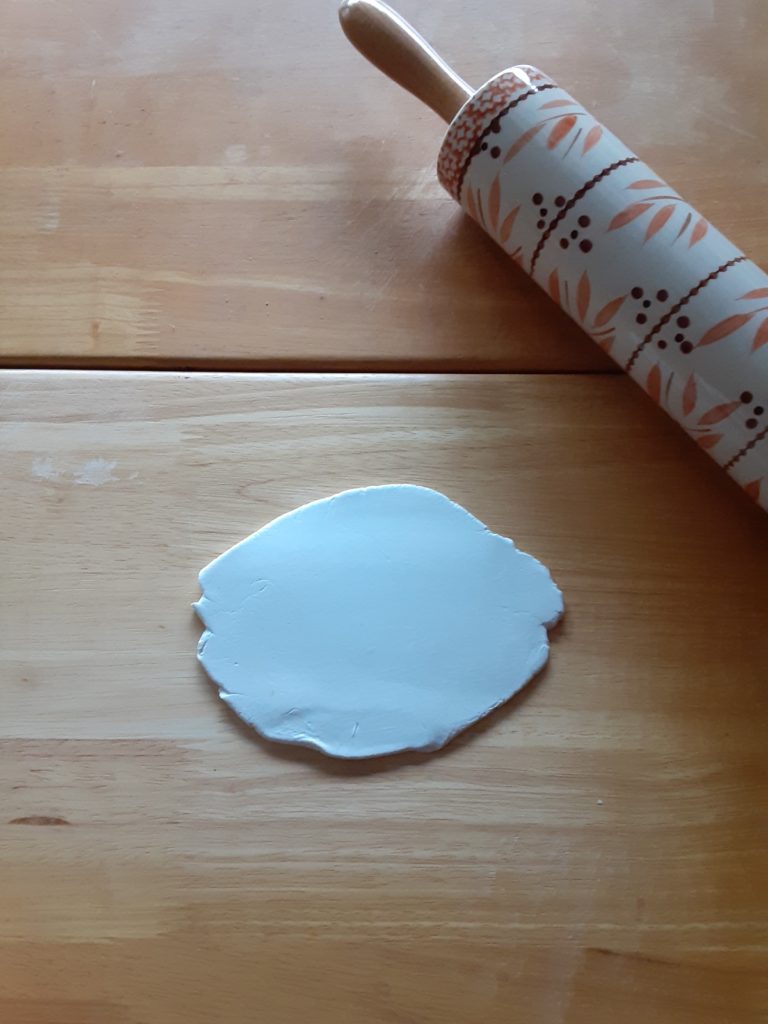
- First, work the clay in your hands to soften it, and break off a ball of clay.
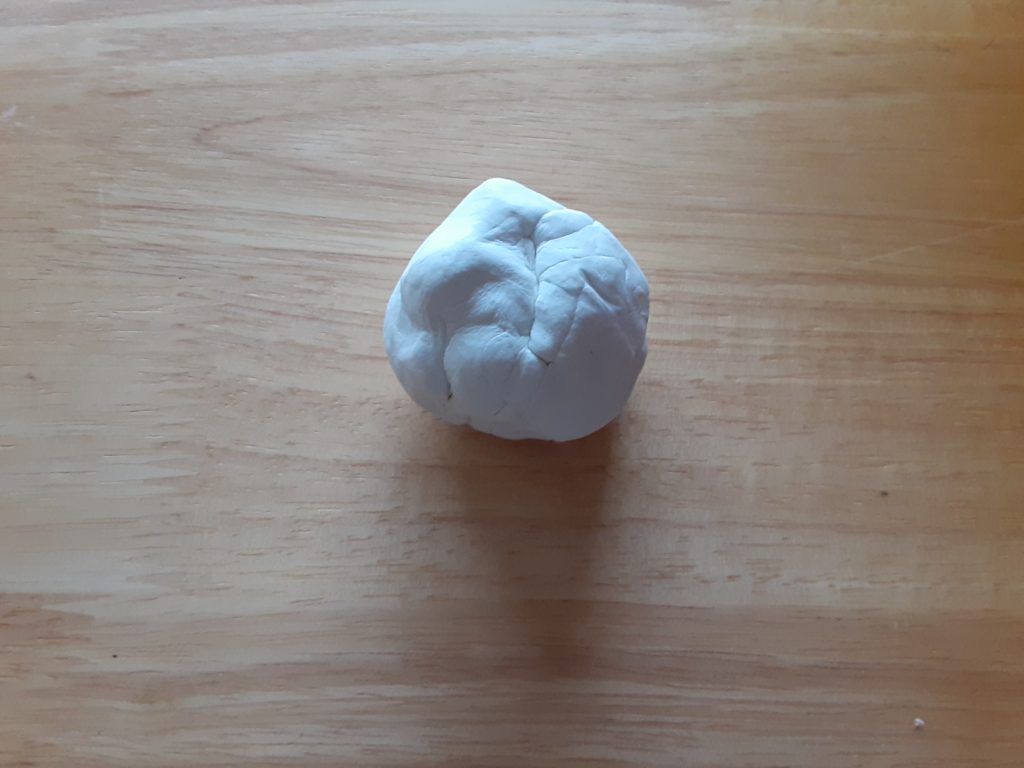
- Next, roll your clay flat. Don’t roll it too thin. However, be mindful that the thicker, the clay the longer it will take to dry. My ornaments were ⅛” to just under ¼’ thick. It worked well.
- Now, choose a cookie cutter and press it into the clay.
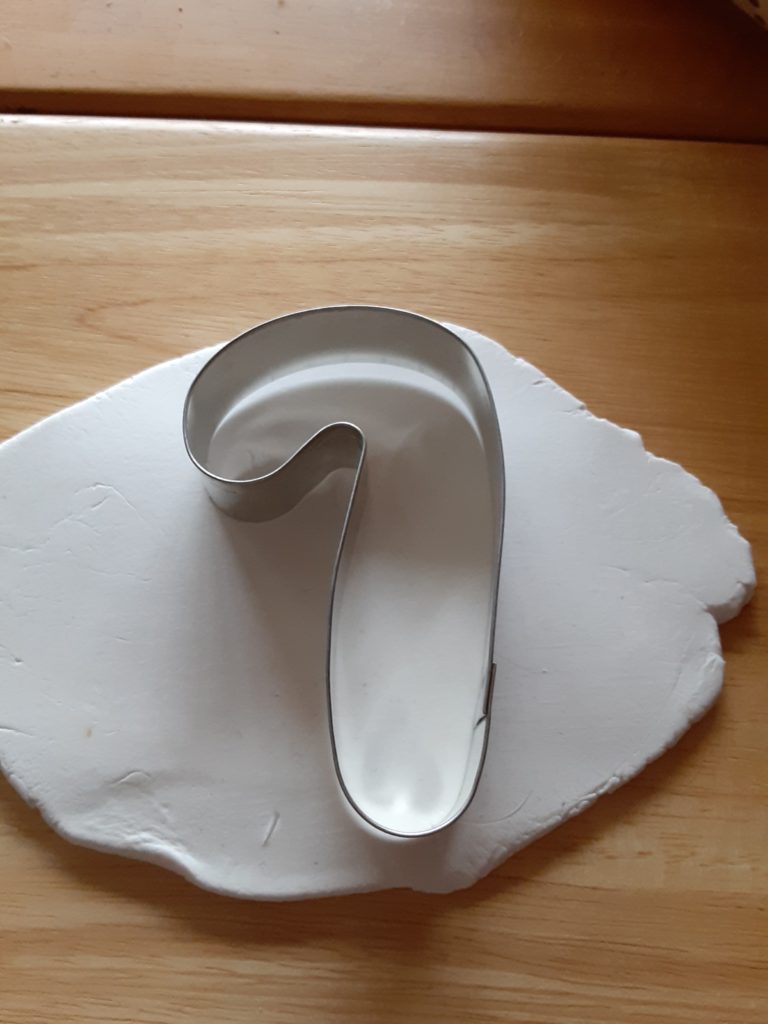
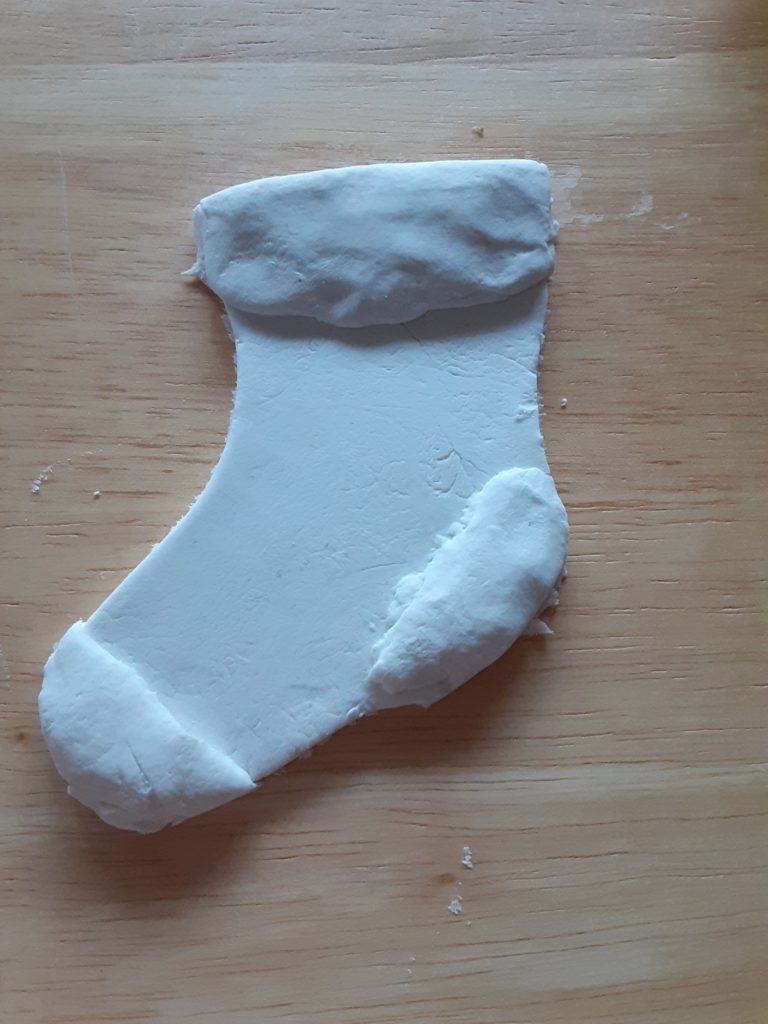
- Take the cut-out clay shape and put it on your work surface. You will use the extra clay, so keep it close by.
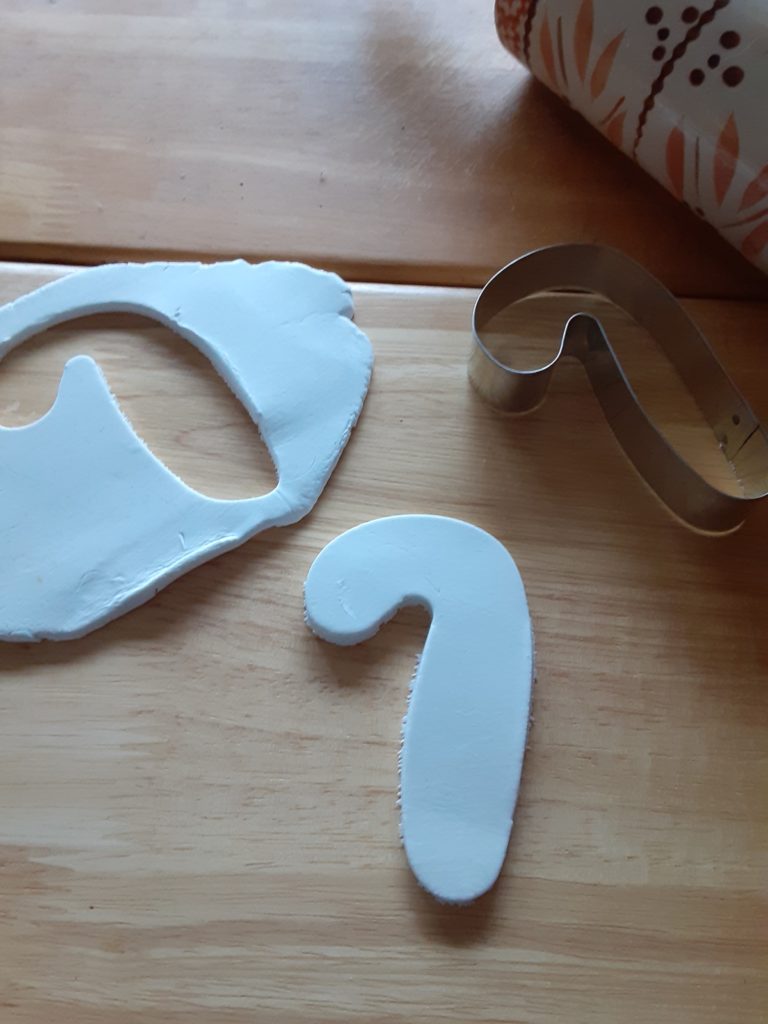
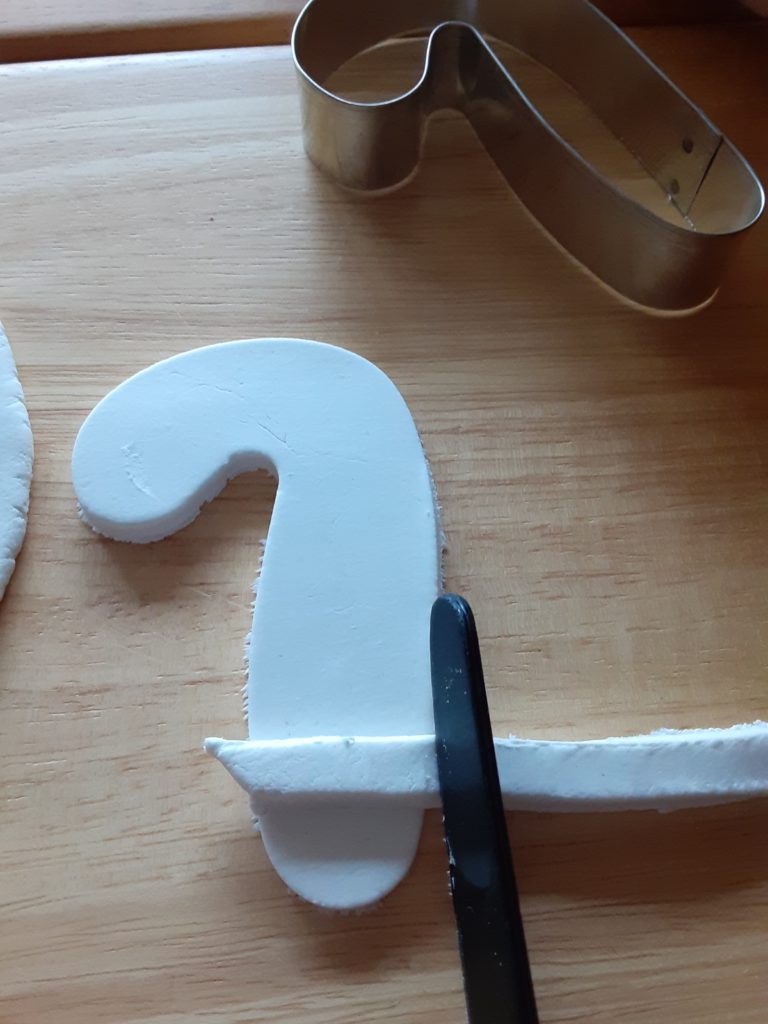
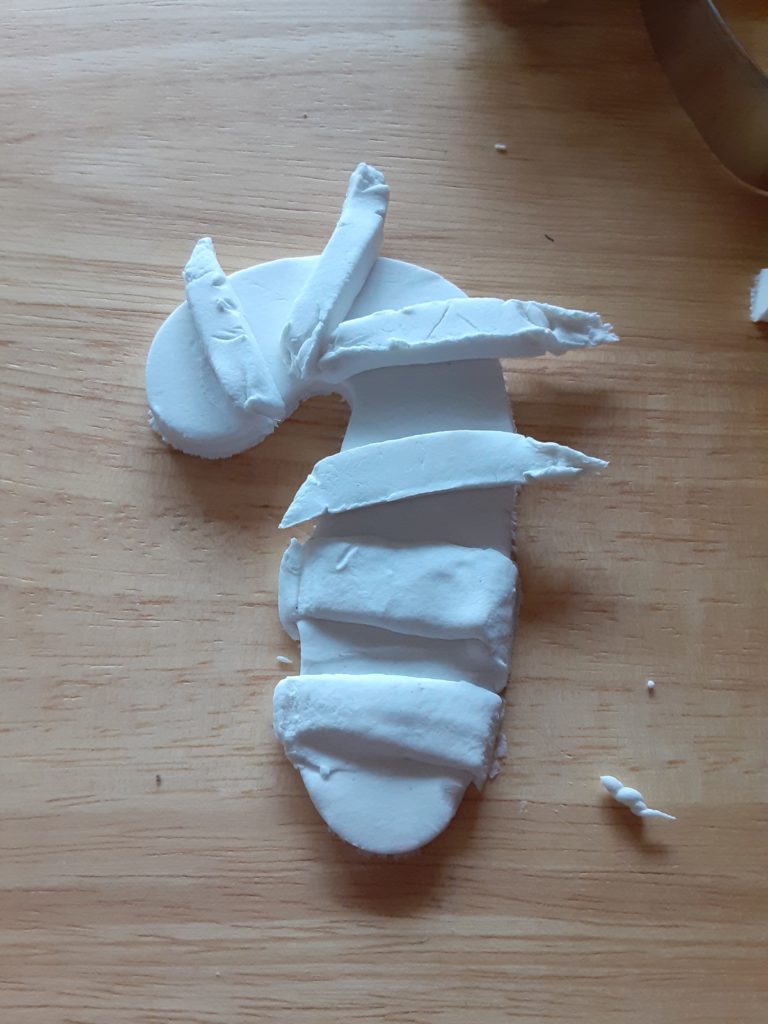
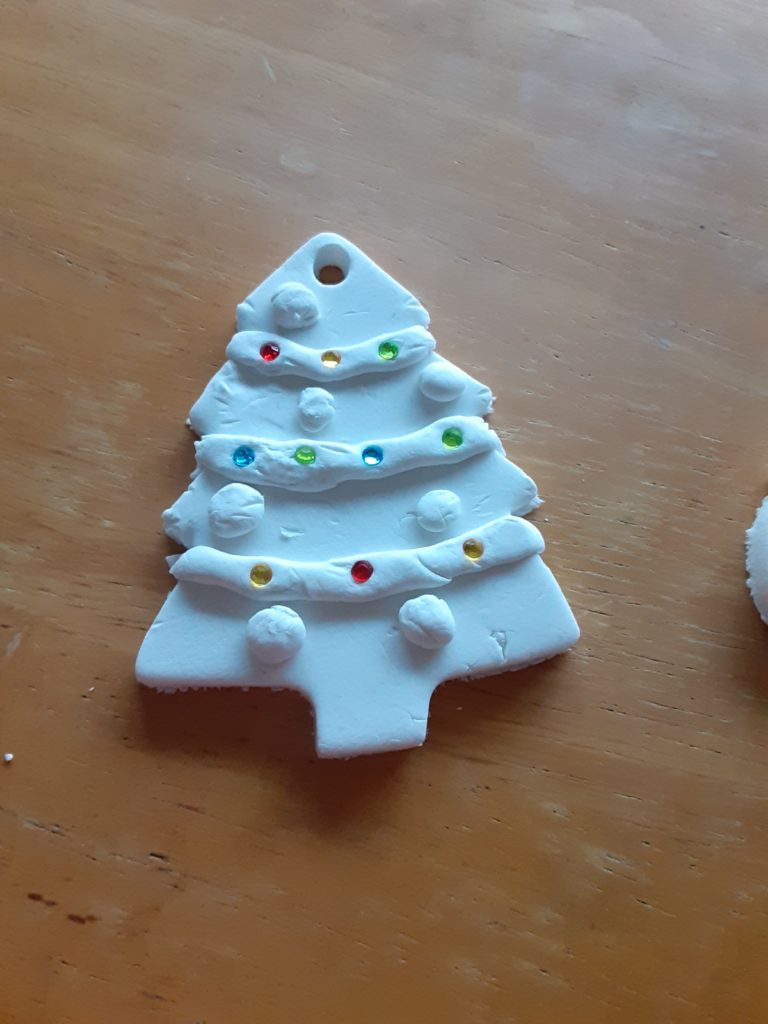
- Next, decide what you want to place on your ornament to make it raised. My first ornament was a candy cane (I wanted to start easy). So, I decided to make the stripes raised. I used my plastic knife to cut off strips from my extra clay. After, I set the strips on top of the candy cane and smoothed the edges to blend it.
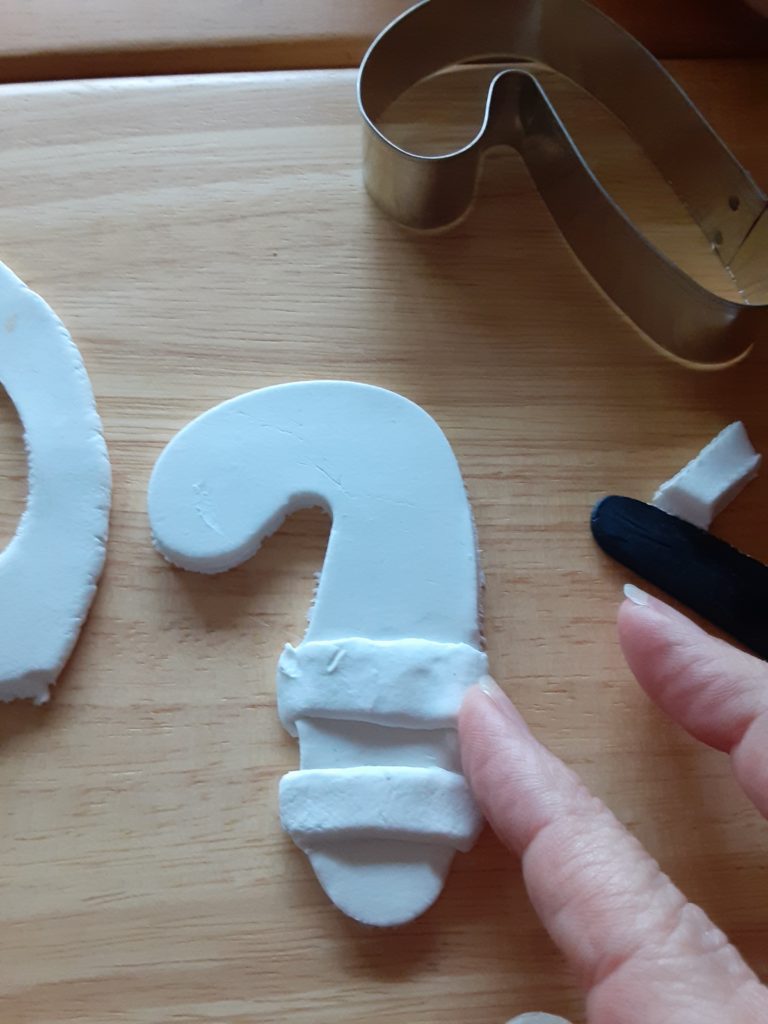
- Now take your straw and make a hole in the top of the clay ornament. However, do not make the hole too close to the edges. If the hole is too close to the sides, it may break easily. You will be threading your yarn or ribbon through the opening when it is dry.
- Set the clay ornaments somewhere to dry. My ornaments took about 1 1/2 days to dry. If you are using oven-bake clay, you can bake your ornaments and begin painting sooner.
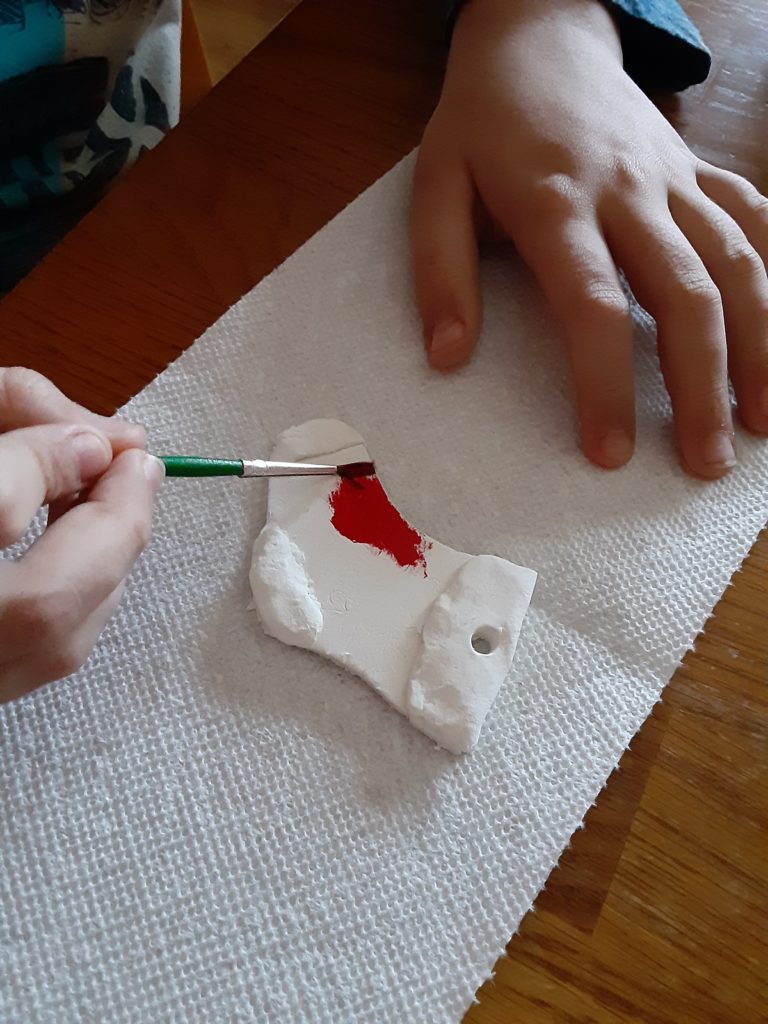
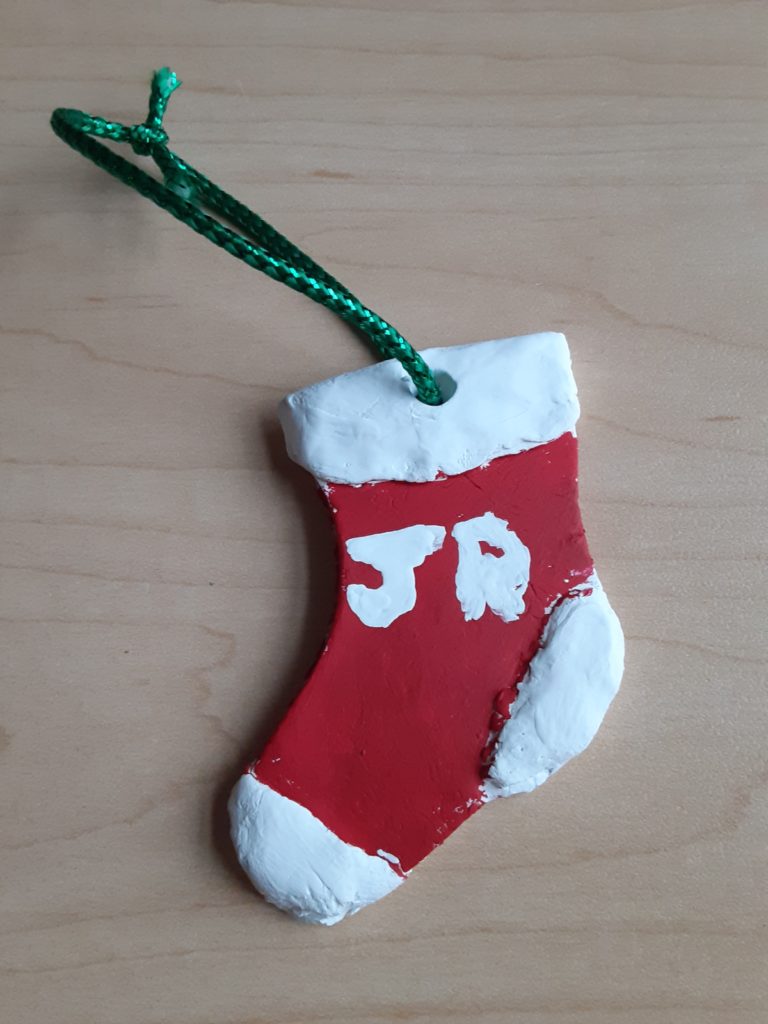
8. Finally, when the clay is dry, it is time to paint your ornament! Once the paint is dry, add your ribbon or yarn to hang your clay creation.
Here are some other ornaments we made and decorated.

I pressed sequins into this one since it was air-dry clay. 
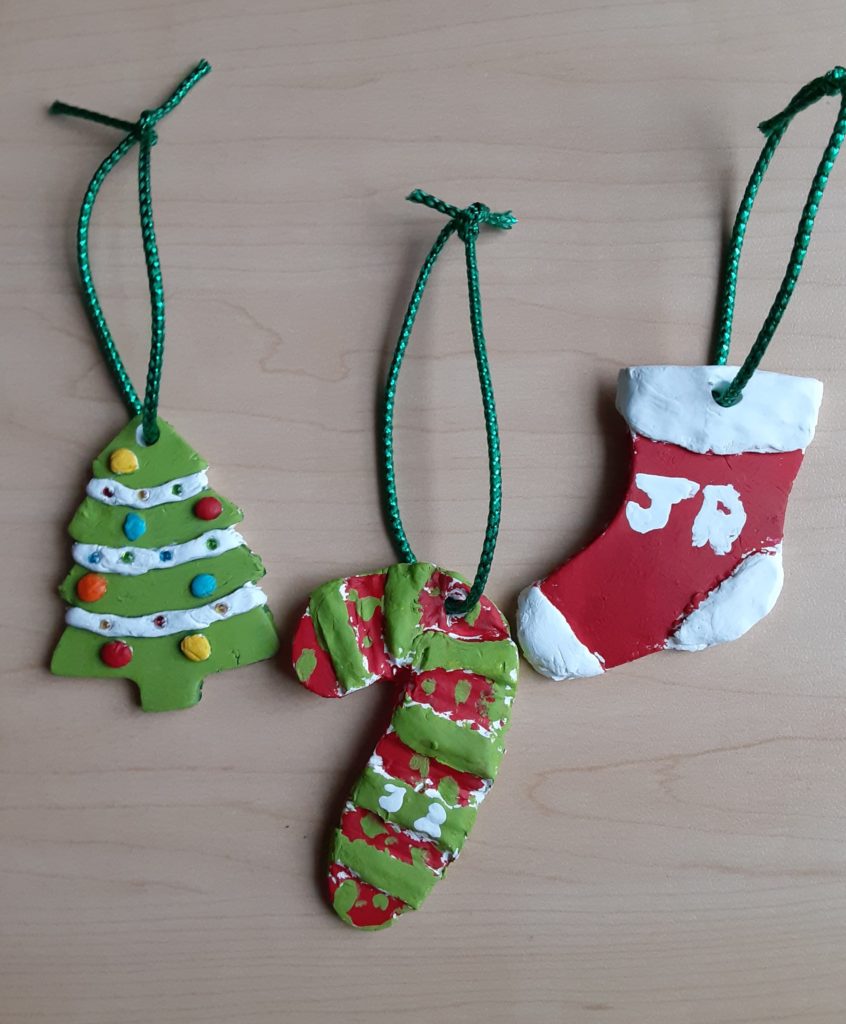
Christmas Clay Ornament Fun
As you can see, these clay ornaments are simple to make and the raised elements make it a little more special. Also, there are so many options when making them. You can:
- Use cooking cutters or cut out shapes on your own.
- Make different parts raised.
- Paint them or leave them classic white.
- Use more than just Christmas shapes. Not all ornaments are Christmas themed, after all.
- Add sequins, glitter, and other decorative embellishments if using air-dry clay. I don’t know if it is a good idea to use such items if baking your clay.
So as the Christmas season gets underway, try making some pretty raised clay ornaments. They will be a beautiful addition to your Christmas tree or someone else’s.
Want more Christmas ideas??? Check out these projects.
- Christmas Activity for Teens: Homemade Christmas Cards
- Christmas Activities for Teens (and Tweens)
- Pretty Christmas Tree Art Project for Kids
Over at My Teaching Library, you can also find a ton of Christmas activities for all ages! Check it out HERE.