
S.T.E.M. is so much FUN! There I said it. I know I’ve said it before, but I really enjoy it which is surprising to me. Growing up, the teachers didn’t talk about S.T.E.M. I don’t think the term was around when I was a kid. Personally, I probably would have balked at it because I hated science and math. Let’s face it, growing up in the 80s and 90s technology was not like it is today. And engineering? Wasn’t that something geeks got into? I can say that because I’m married to an engineer, and I joke with him about it.
Today you hear the term S.T.E.M A LOT! And I absolutely love it. I never knew using the left side of my brain could be so much fun. Needless to say, I’ve done a lot of S.T.E.M projects with my kids over the years. I wanted to share five activities we’ve had fun with or were amazed and challenged by.

#1 Balloon Rockets
I found this fun activity several years back. What kid wouldn’t love racing balloon rockets?! Here is the link to the site.
Materials
- Balloons of various sizes
- String
- Tape
- Straws
Set up
- Cut a piece of string about 6 to 8 feet long for each child.
- Tape one end of the string to a chair, table, etc.
- Thread the other end of the string through the straw.
- Tape the other end of the string onto a chair, table, etc. several feet away until the string is taut.
Each child should now have a string running between two chairs or tables with a straw threaded through it. It is kind of like a zip line. You don’t need to have one for each child, but we did because we were racing the balloons.
Setting Off the Balloon Rockets
Here is the fun part. Each kid blows up the same-sized balloon but doesn’t tie it off. They can use a
Next, someone needs to tape the balloon onto the straw. The balloon needs to hang under the string. The tape goes over the straw and onto the balloon. Do this for all the kids.
Count down and release the balloons. See whose balloon reaches the end first or whose balloon goes the farthest.
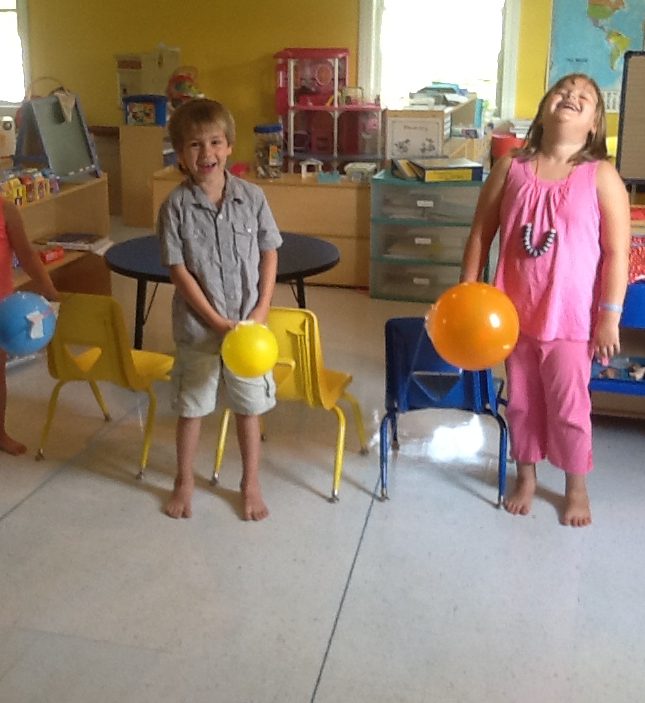
Now for the science part. The kids tried out different-sized balloons and different-shaped balloons. So we used
#2 How Much Weight Can Paper Hold
This activity amazed us the most. We were flabbergasted by the results. It was a simple activity, but it was a very impressive one. Here is the site I got the activity from.
For the activity, you roll three pieces of paper into three different shapes. Then, you test each shape to see which one withstands the most weight.
Materials
- Three pieces of copy paper.
- Books to use for weights.
Set-Up
- Roll one sheet so it makes a circular shape on the end, and tape it.
- Roll one sheet so it makes a square shape on the end, and tape it.
- Roll one sheet so it makes a triangle shape on the end, and tape it.

Time to Begin
First, I had the kids make a prediction on which shape they felt would hold the most weight. Then, I had them predict how many books it could hold.
We tested their hypothesis. Boy, we were wrong. The kids guessed the correct shape that would hold the most weight, but we were way off on how many books it could hold. We decided to take it a little further. Look at our results.

Spoiler alert: The circular shape could hold the most weight. We discussed why this was (no edges), and I had the kids think about the architecture of various buildings to see how this principle applies in real life. I’m still amazed every time I see our pictures.
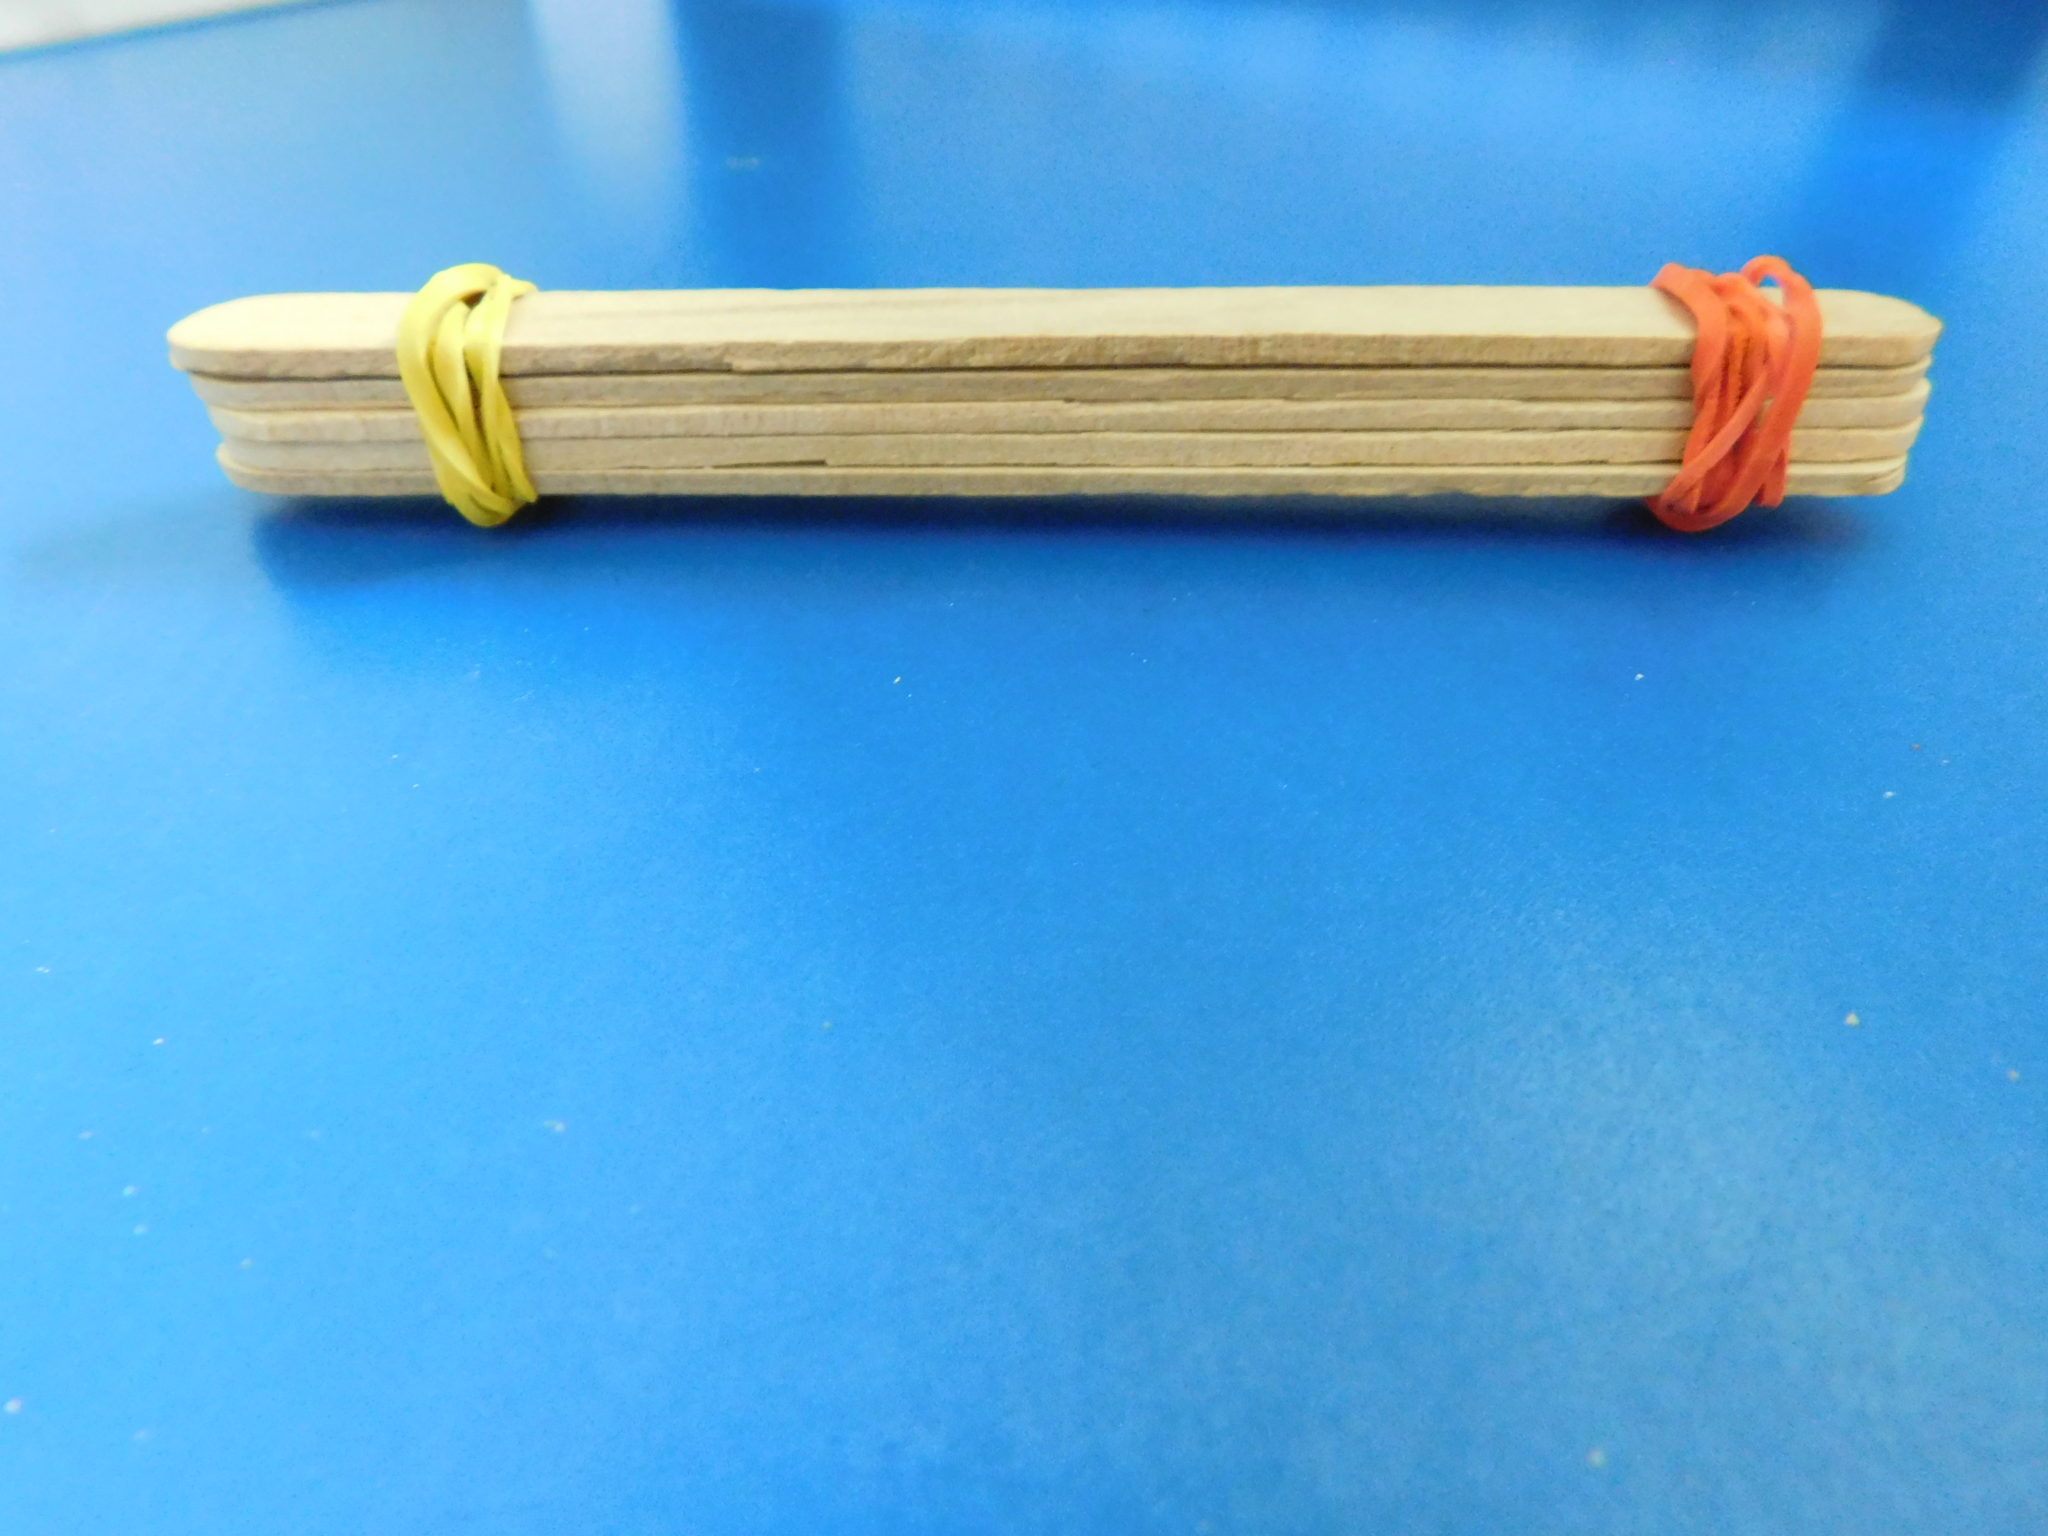
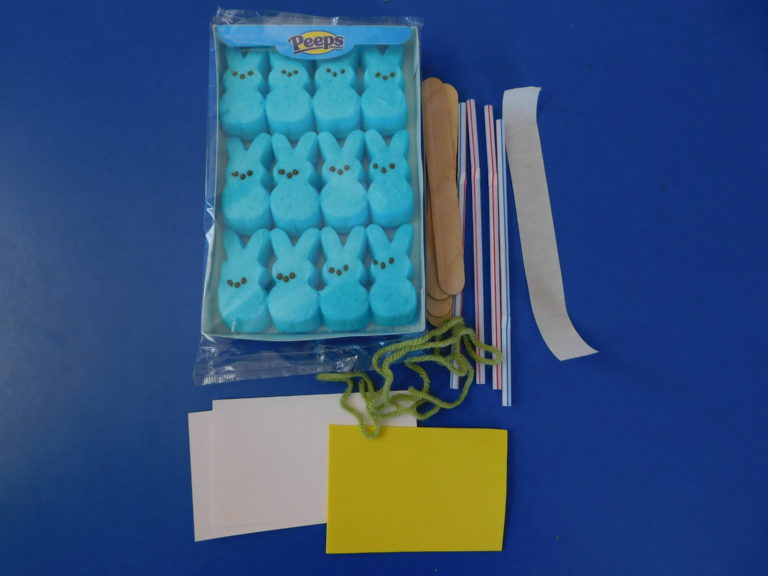
#3 Catapults
Need I say more? Here is the perfect activity in which kids are allowed to fling things across the room. Not to mention, there are so many different materials you can make them with. One of my favorite sites that has a variety of catapult ideas is found here.
One day, we made a simple catapult with items we easily found around the house. I am a pack-rat, I mean collector of potentially useful craft materials, so I found them easily around our house.
Materials
- Popsicle sticks
- Elastic bands
- Milk or juice caps
- Hot glue gun
Set-Up
First, I stacked 5 P
Next, I took 2 P
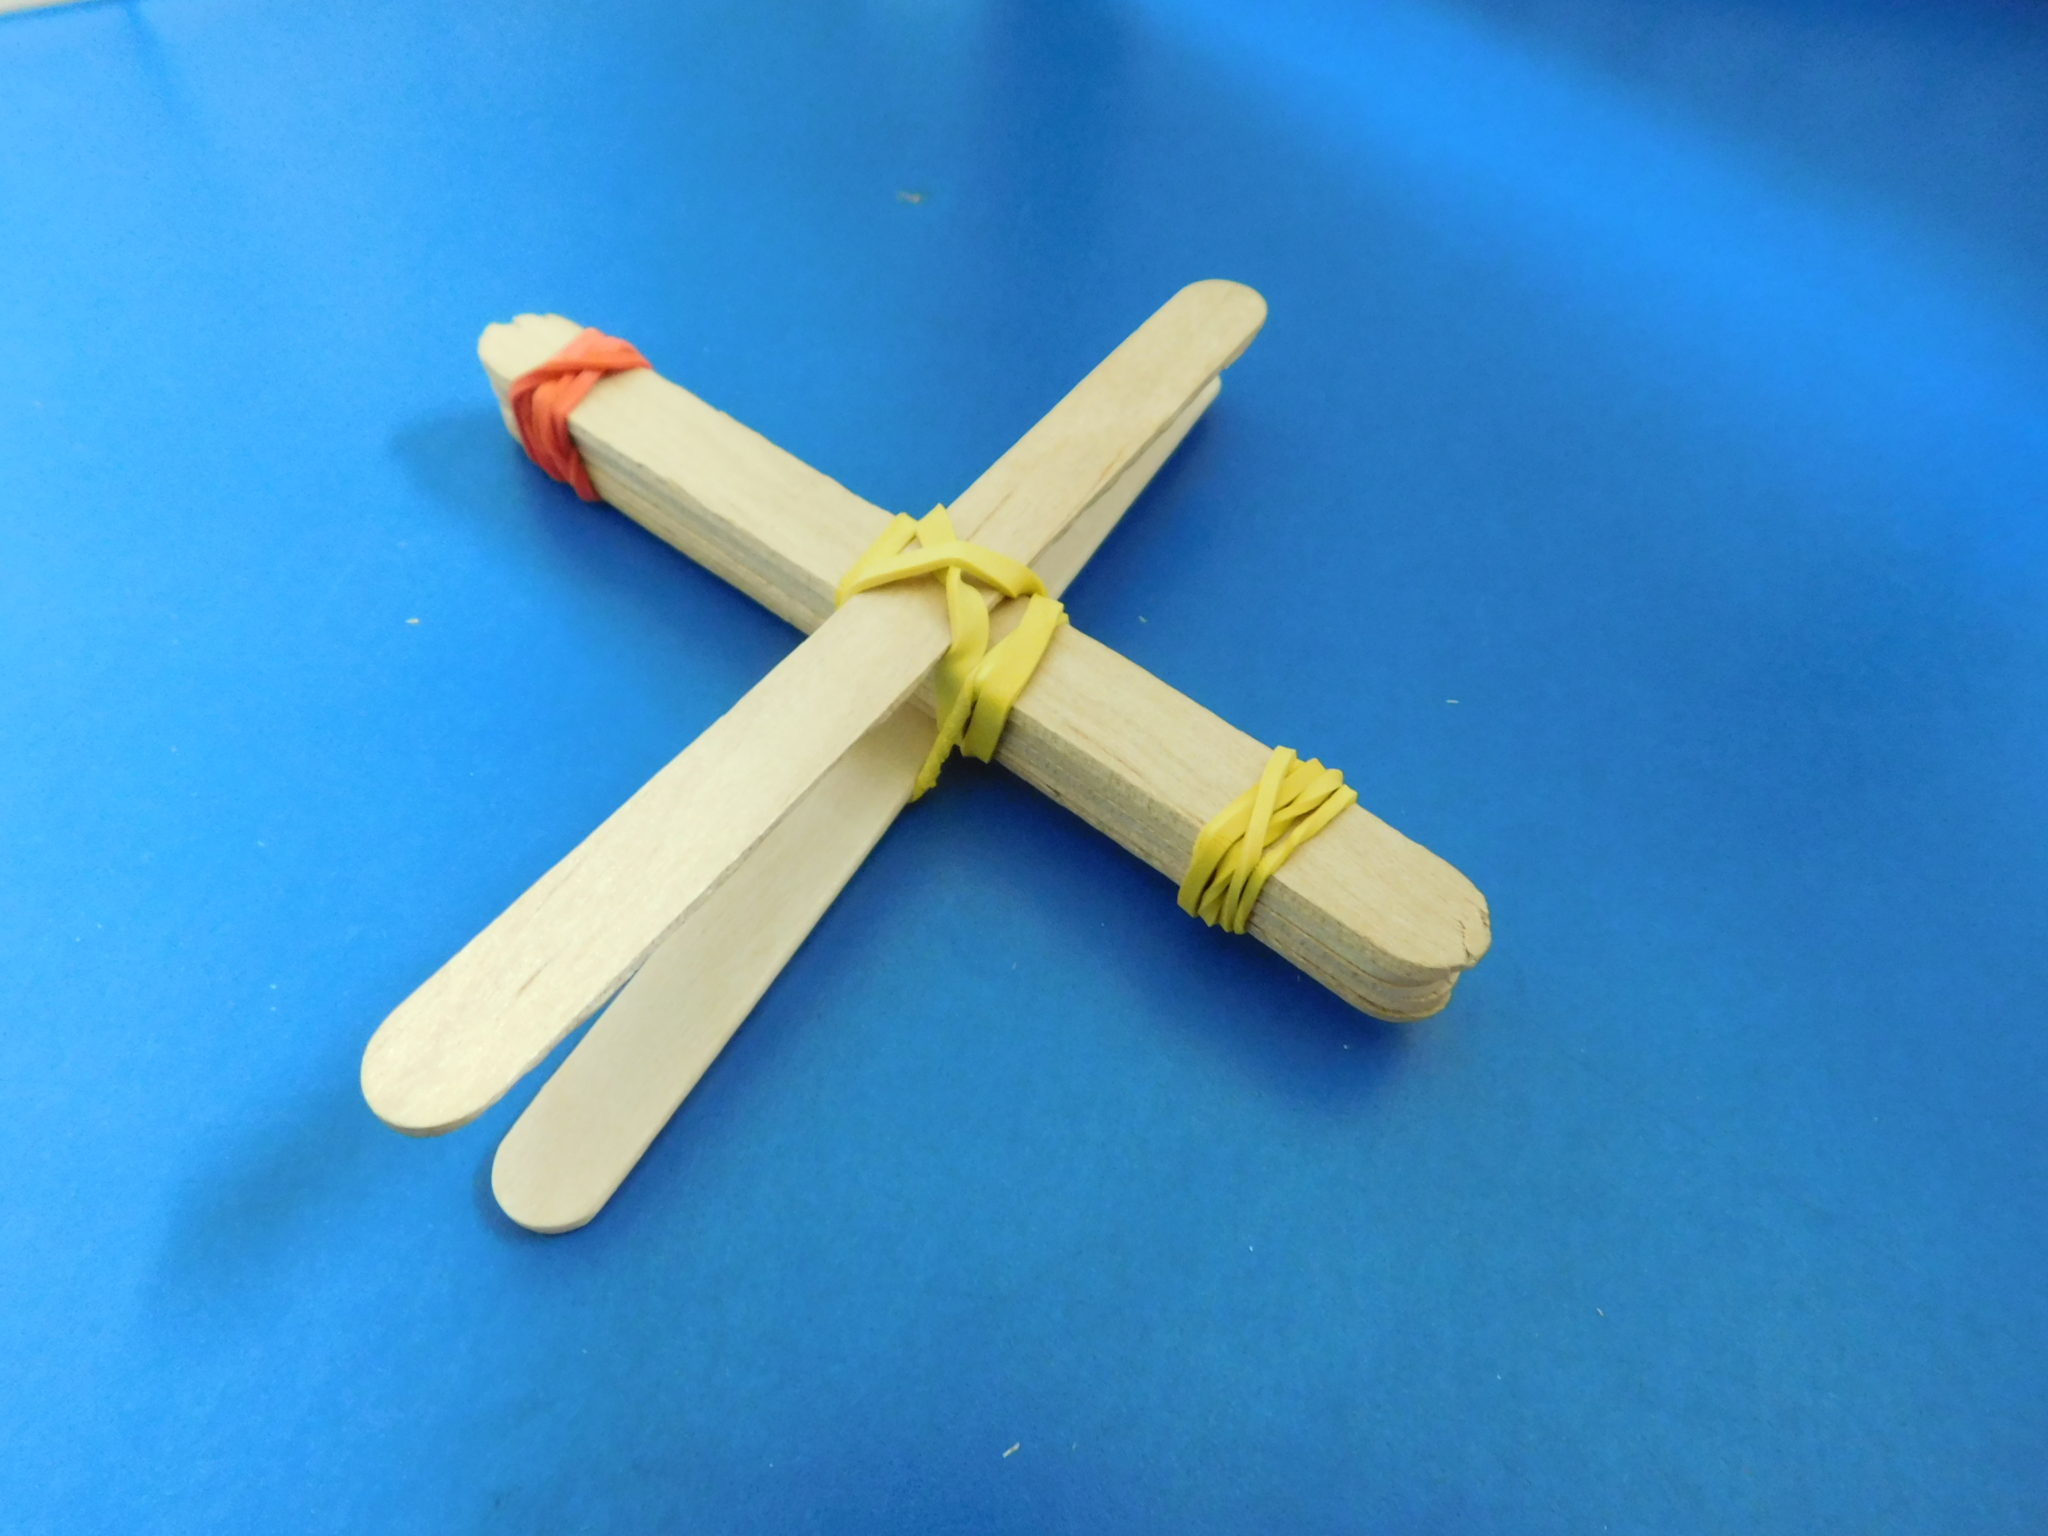
Now take another elastic and wrap it on the end on one side. These pieces should look like an open crocodile mouth.
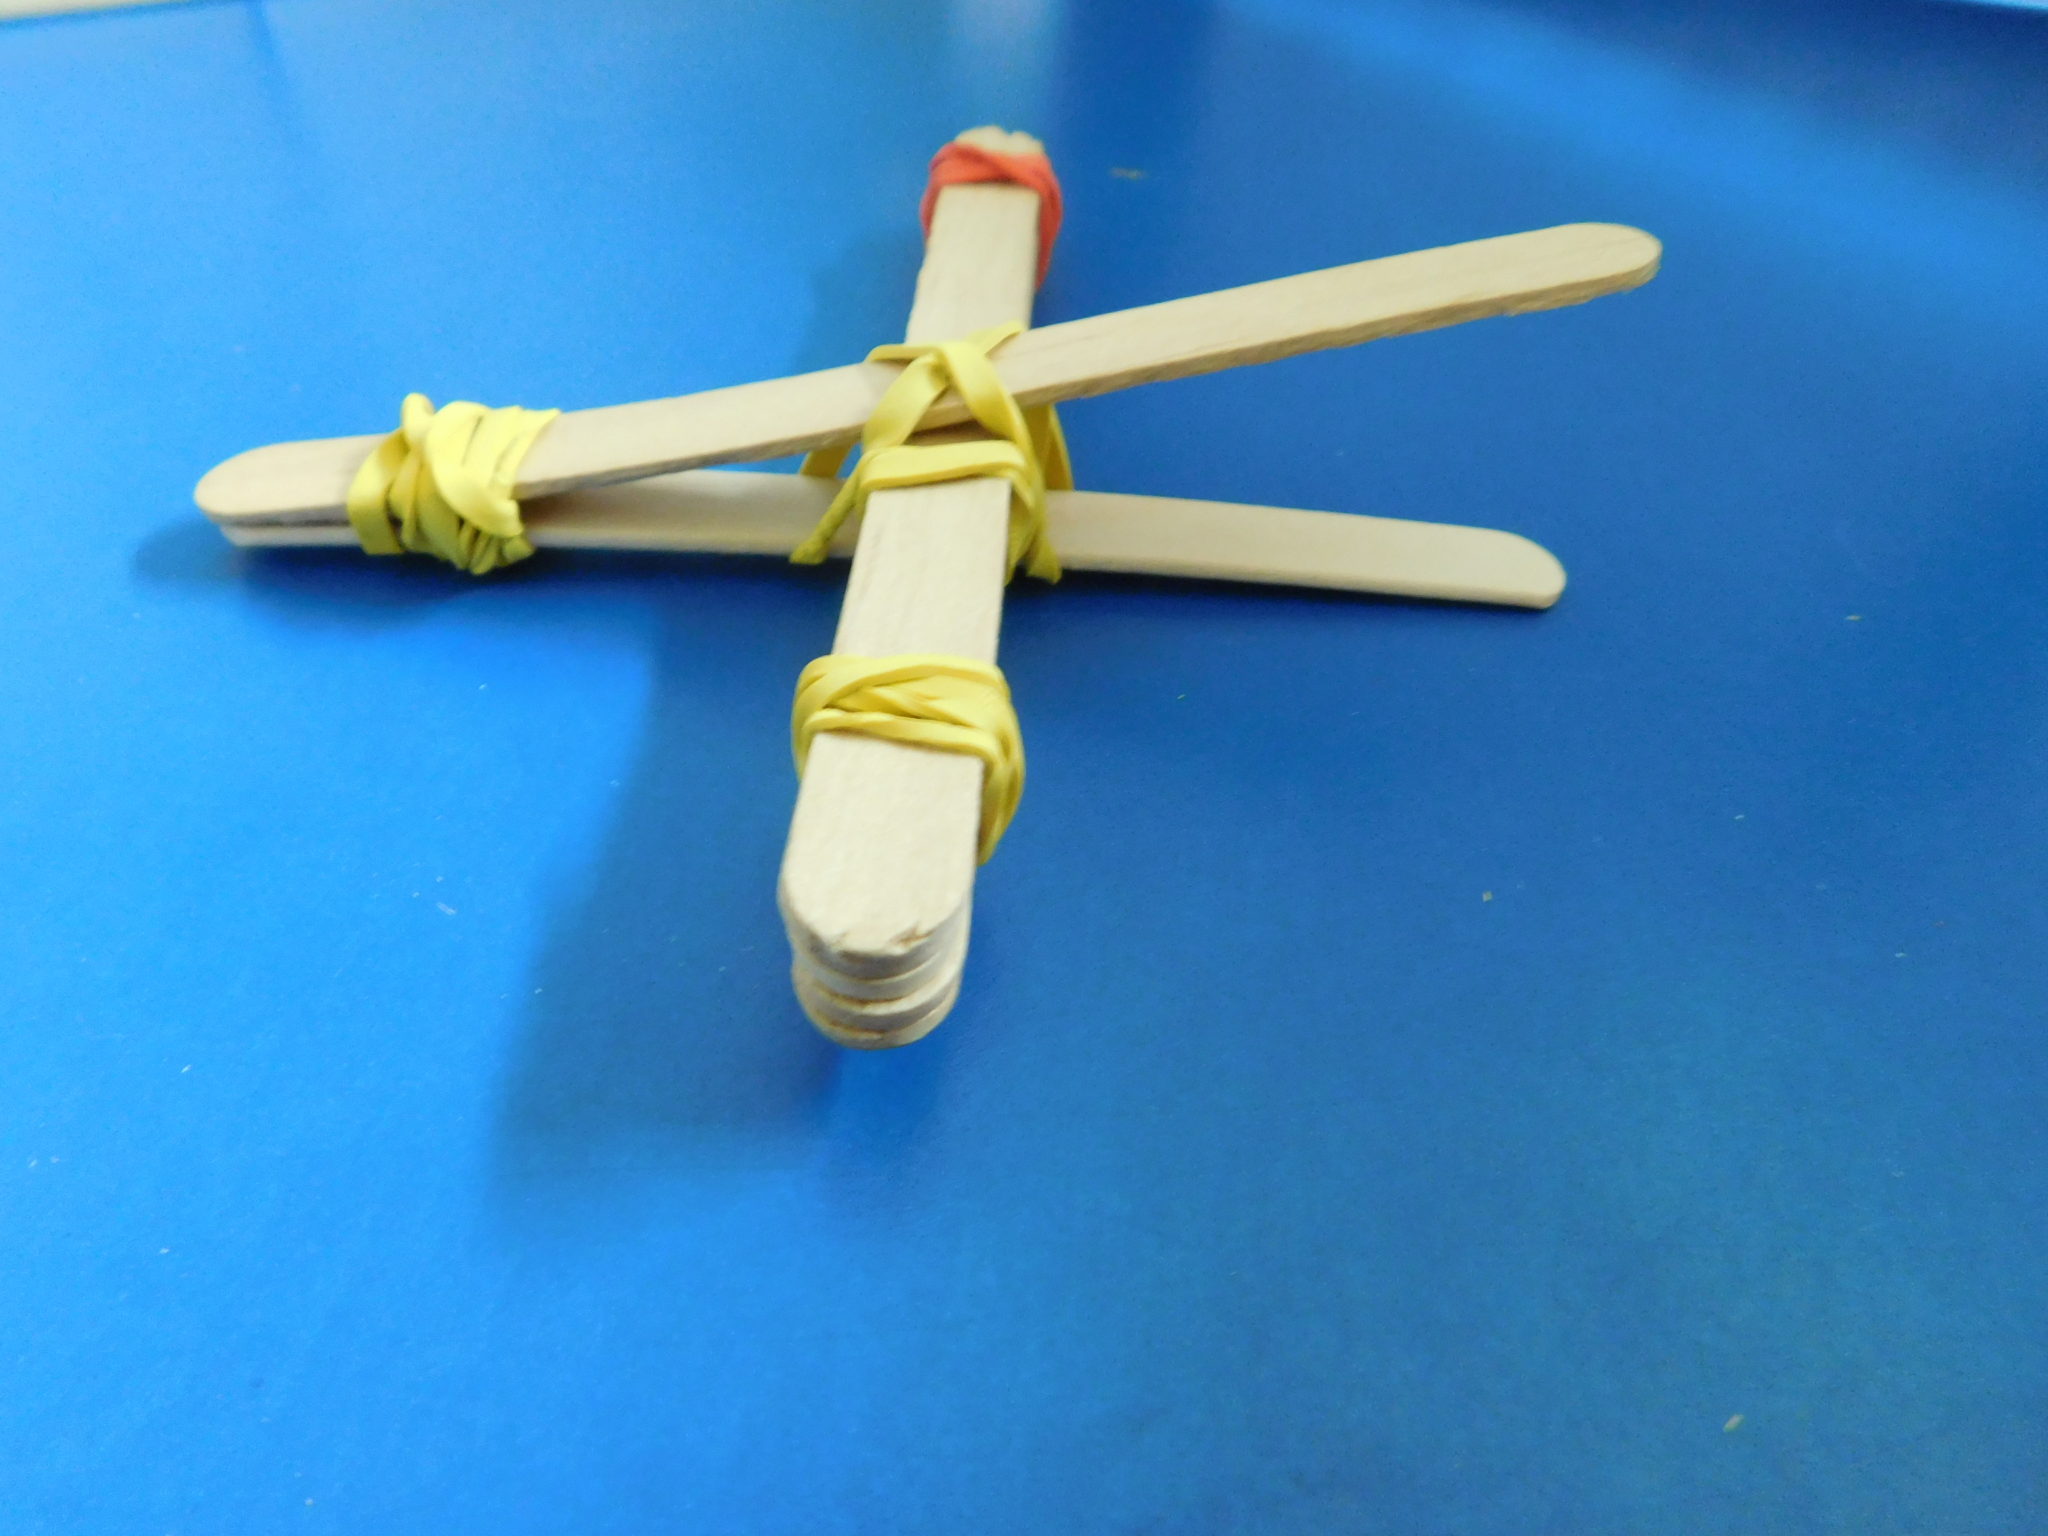
Lastly, I hot glued a milk cap on top of the popsicle stick that is up in the air. This makes your holder for the items you will launch.

Ready, Set, Launch
We launched mini marshmallows and pennies. The kids tried to see if they could hit certain items, who could fling their marshmallow/penny the farthest, and if they could get them over a line at a set distance away.
The kids had to try and try again to determine how much pressure they needed to put on their catapult to get it where they wanted it to go. At first, they would do it too hard. Then they wouldn’t put enough pressure. It took a lot of trial and error.
#4 Marble Maze
I looked at the maze activities for quite some time before I decided to give it a try. I’m not sure why I was hesitant. Maybe I was afraid it would be too hard or too frustrating. I saw maze activities for preschoolers so I finally decided to give it a try. I’m glad I did. The kids had fun with it.
There are so many different ways to do this activity. Here is how we made ours.
Materials
- A box lid or a shallow box with sides
- Pencil
- Glue
- Straws
- Marble
Creating the Maze
I had my kids use a pencil to draw their mazes inside their boxes. If they made a mistake or saw something that may not work, they could erase it and try again.
Next, the kids cut and glued down straws on the lines they drew inside their boxes. The straws were the edges for the marble to hit and move along.
Now it was time to wait for the glue to dry. This was very difficult for my son since he was very anxious to try his maze.
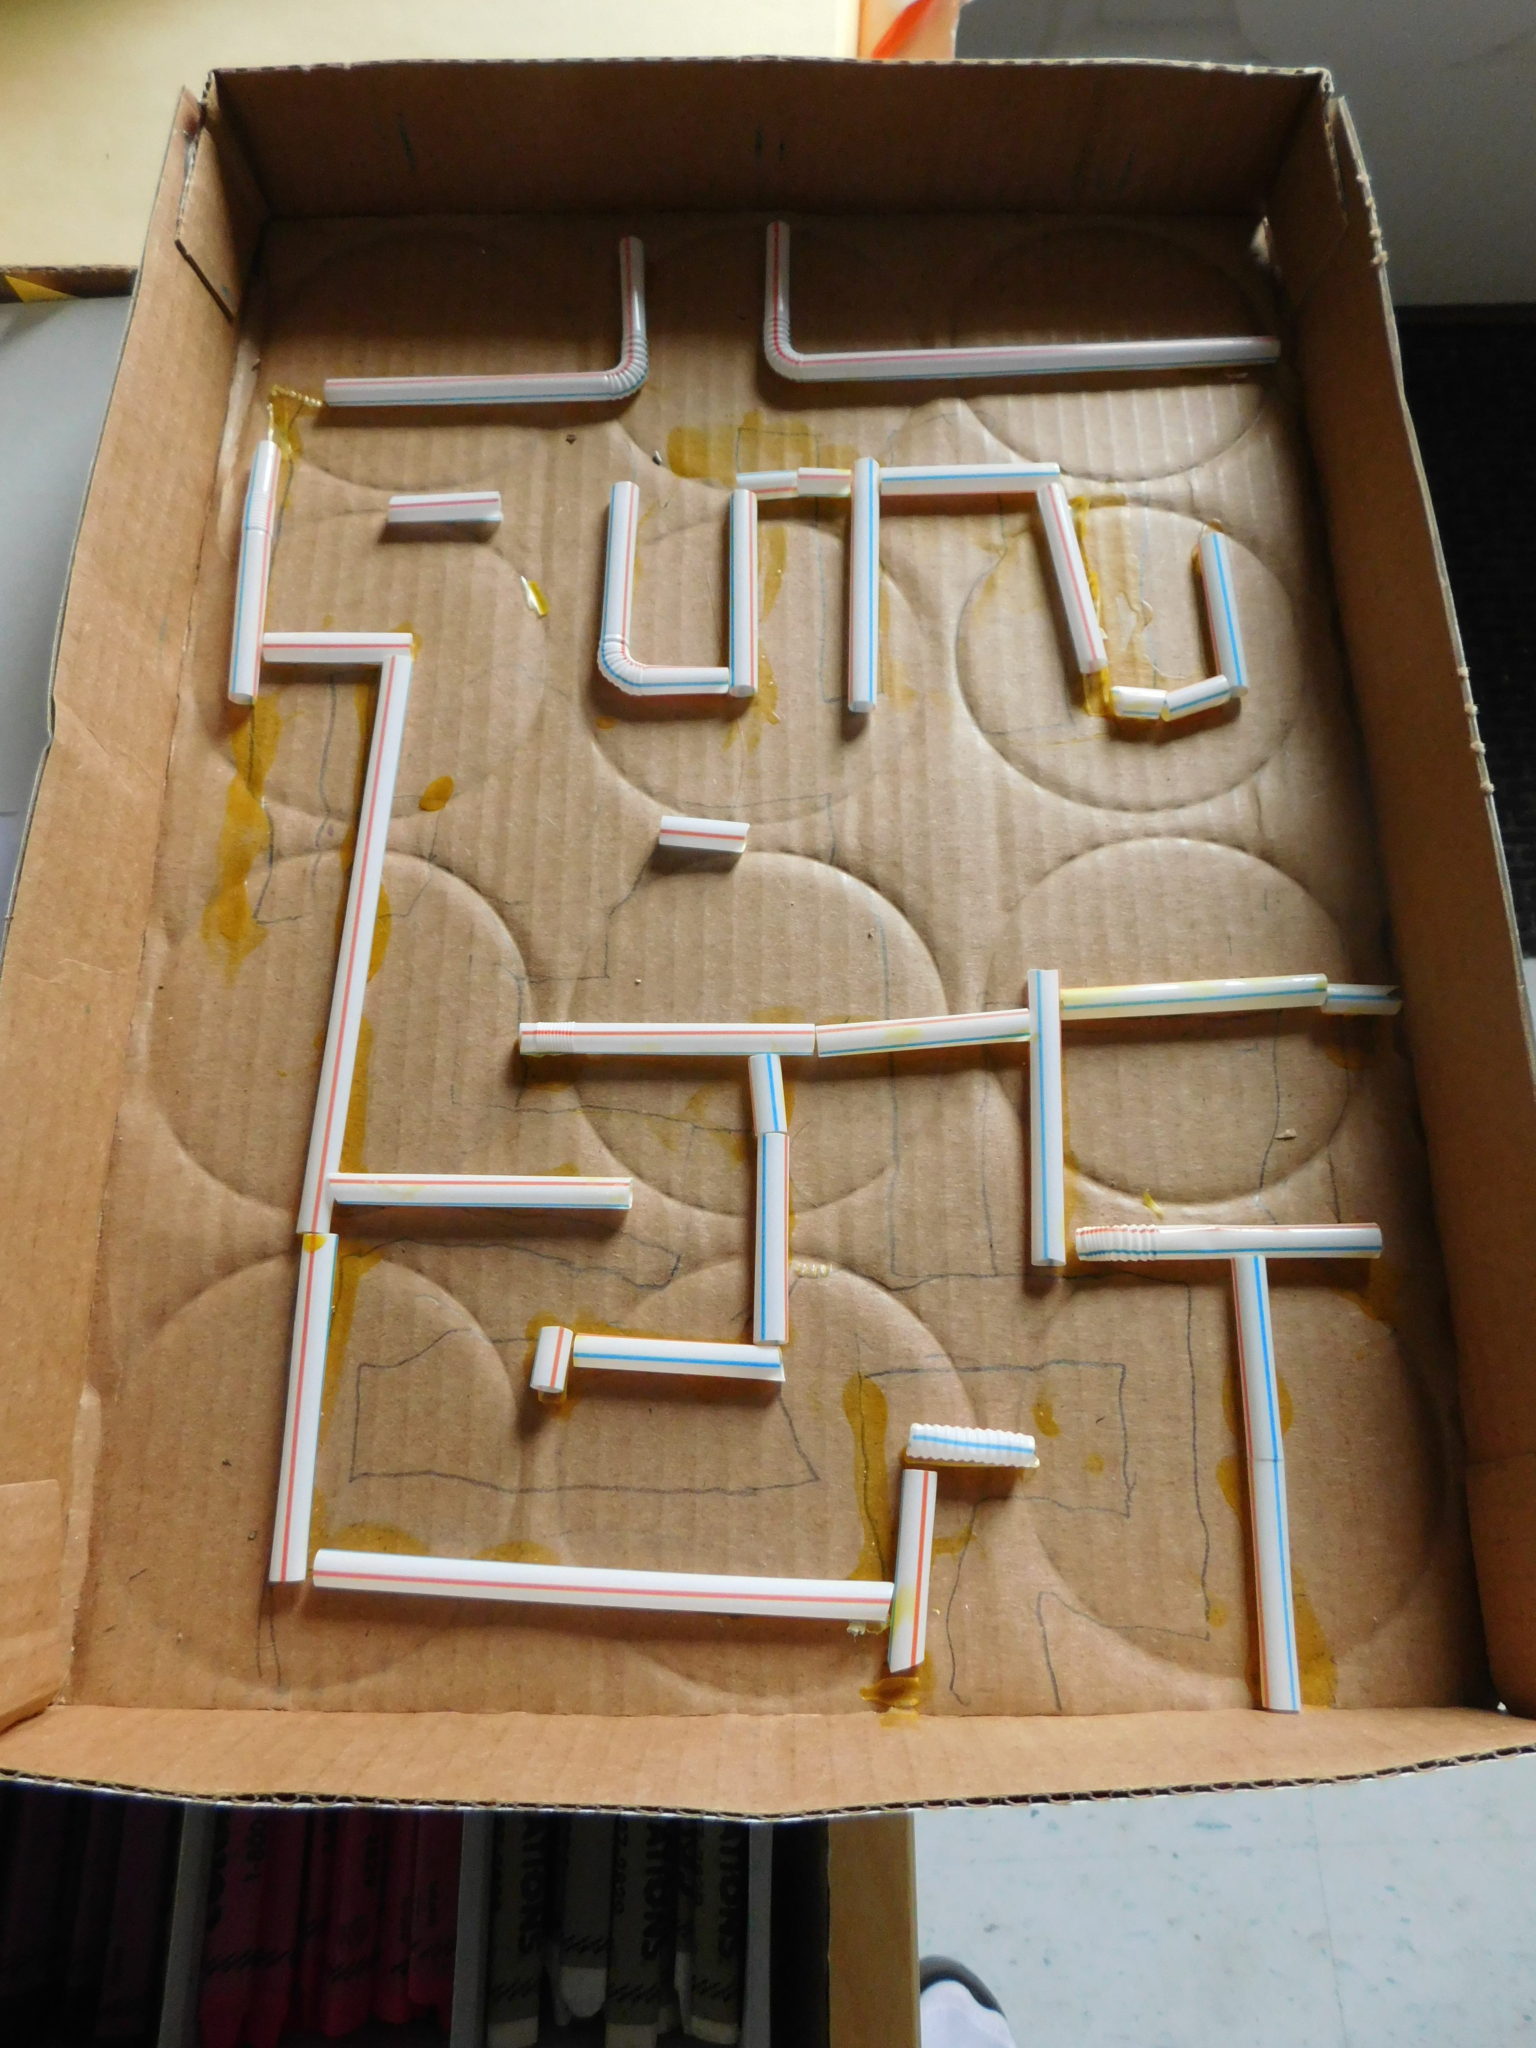
Using the Mazes
After waiting forever, as my son put it, they finally tried out their mazes. They each put a marble in their box and tilted it back and forth to move the marble along the paths they created.
Even though my son drew out his maze first, he quickly found an area of his maze that didn’t work. Luckily, we used school glue so he could easily remove it and reposition it. Unfortunately, he had to wait for the glue to dry again.
My son had the most fun with this activity. He kept adjusting his maze to make it even better. He added shorter and larger straws in different places. I love seeing the scientific process at work.
#5 Make or Remake A Game
My kids love to play games. My daughter loves to make them. So this activity intrigued her. She took off with this one running. I was inspired to try this challenge by Student Savvy that you can find here.
My daughter decided to try her hand at making her own fuse ball game like the site showed. It came out well, but what she really wanted to make was a skee ball game. She went looking through all our junk, I mean useful craft materials, and found the pieces she wanted to use. Here’s how she made it.
Materials
- A cardboard tray the cat food cans come in or use any kind of box and cut it how you want it.
- Recycled yogurt, applesauce, and other such plastic containers.
- Scissors.
- Blocks to make a ramp.
- Something to elevate the top of the game off the table.
- A small ball.
Making the Game
My daughter took the pieces of cardboard and taped them together to make the base of the game.
Next, she cut out an opening at the base that the ball would roll up through.
She then cut out circles where she wanted the cups to set in to catch the ball. Once they were cut, she placed her cups inside them.
Lastly, she made a ramp with blocks and notebooks leading up to the game and elevated the back end on a plastic container. Her game was ready to go.

My daughter came up with this design by herself. She wouldn’t even let me see it until she was finished. I am quite impressed with what she did. She gets her engineering brain from her dad.
These S.T.E.M activities were quite a bit of fun. The kids learned a lot while doing them and it is one area where my kids will keep trying something until they get it right, or how they want it. They don’t even realize all the academic and critical thinking skills they are using while doing them. It is always fun to sneak in learning.
What fun activities have you tried with your kids?

[…] challenges (Activities here, here, and […]