

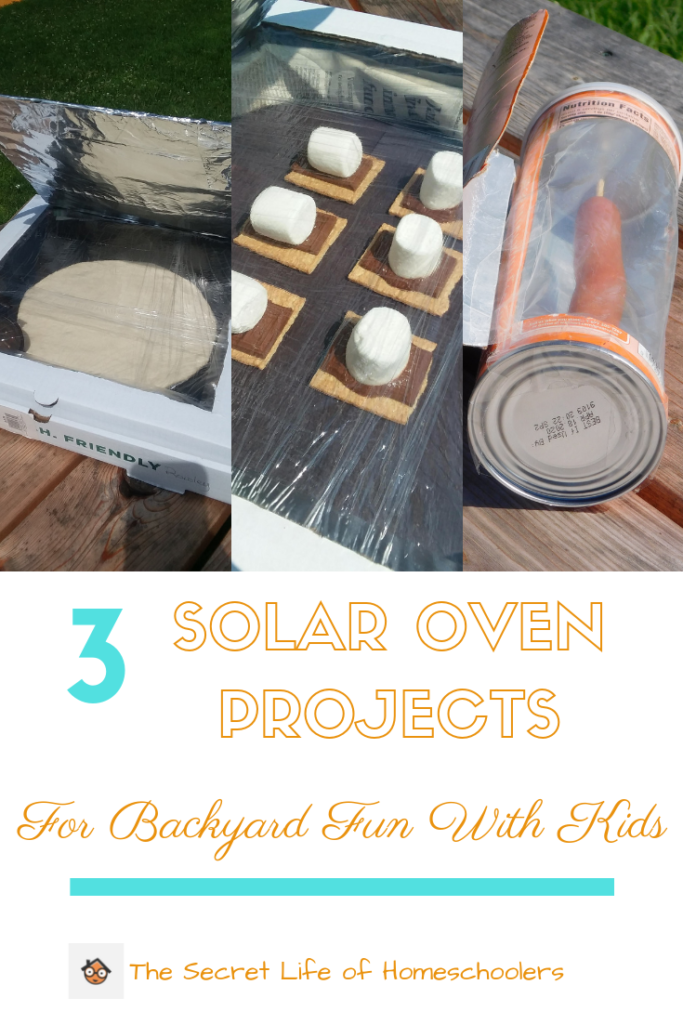
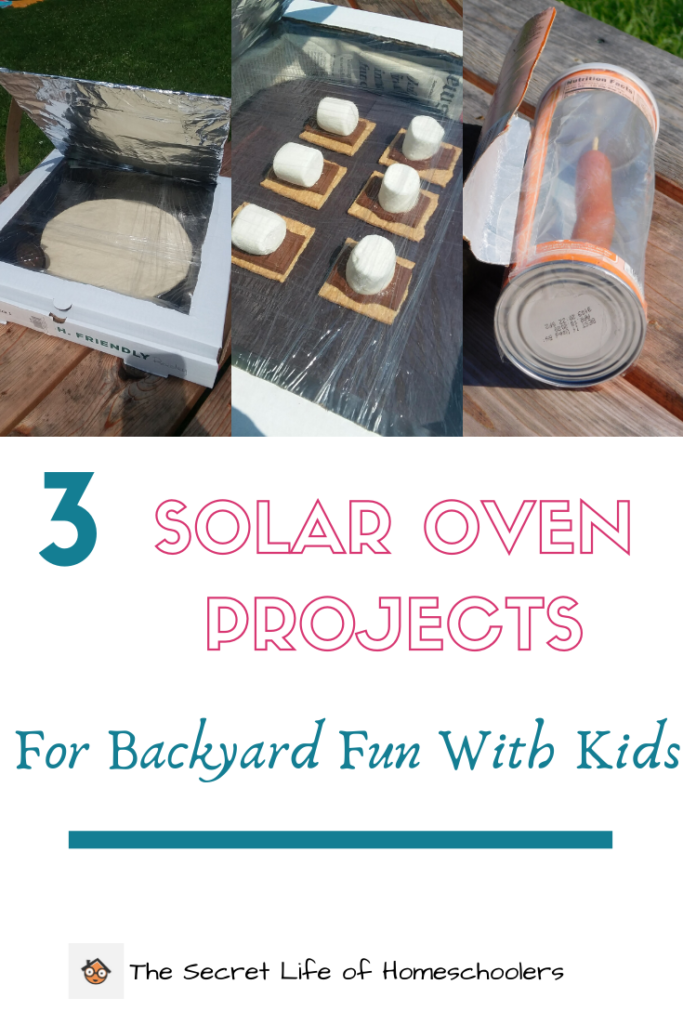
Have you ever wanted to make a solar oven with your kids? I had been pinning ideas on Pinterest for years. We have been saving pizza boxes and Pringles containers for the day we would make solar ovens.
You know how it is, though. Pinterest has a wealth of excellent ideas we want to do with our kids. We save them and nothing. It sits in that folder neglected.
I decided this was going to be the summer we finally did it. AND WE DID!
We have been saving pizza boxes to the point we have almost a dozen boxes and almost 10 Pringles-type containers, too. The kids were dying to use the pizza boxes. So we decided to start there.
Silly me, I asked my kids what they wanted to make, and they said PIZZA!
I will tell you right now; I do NOT recommend starting out with pizza for your first time. We did it, and it didn’t quite work out. My kids are older and can handle disappointment, so it was okay. They didn’t get discouraged.
Heck, my kids kind of expect things not to work 100% because that’s the way it goes for us. I wrote a whole article on what to do when your science experiments fail. You can read it HERE.
I decided the pizza sounded a little ambitious the first time out but decided to give it a try. Here is how we built our solar oven from a Pizza box.
Pizza Box Solar Oven
Items you need:
- Pizza box
- Newspaper
- Black paper
- Clear packing tape (it’s stronger than scotch tape)
- Scissors and/or box cutter
- Clear plastic wrap
- Aluminum foil
- A piece of scrap cardboard either from what you cut or from something else
Directions:
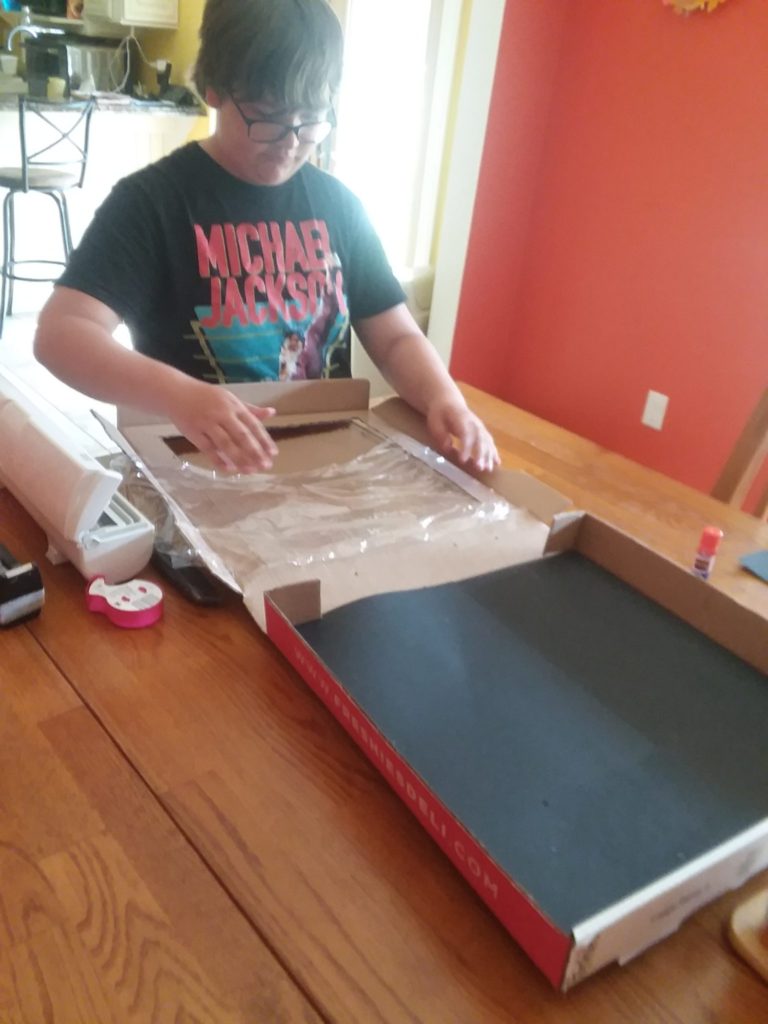
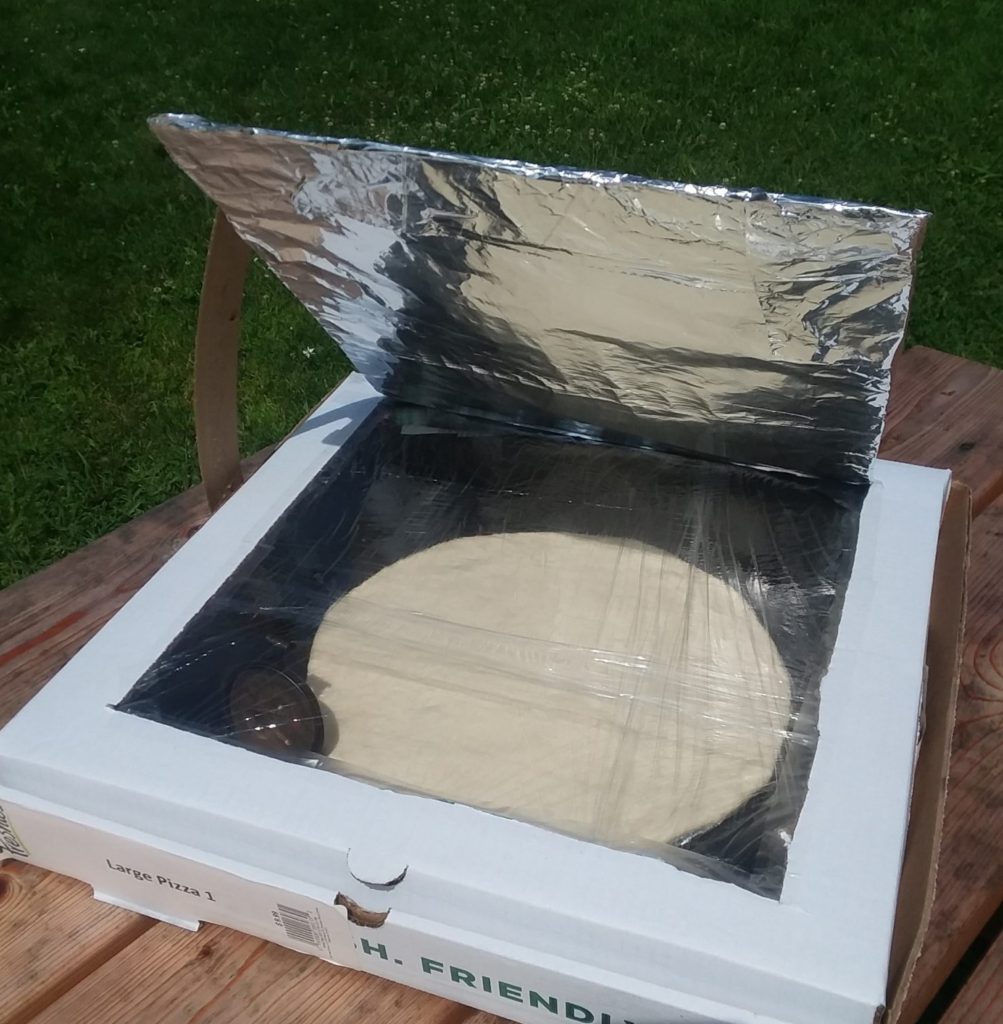
- Using the scissors or box cutter, cut a flap on the top of the box. You want to start cutting an inch or so in from the side. You will cut along the sides and front of the box. Leave the back still attached.
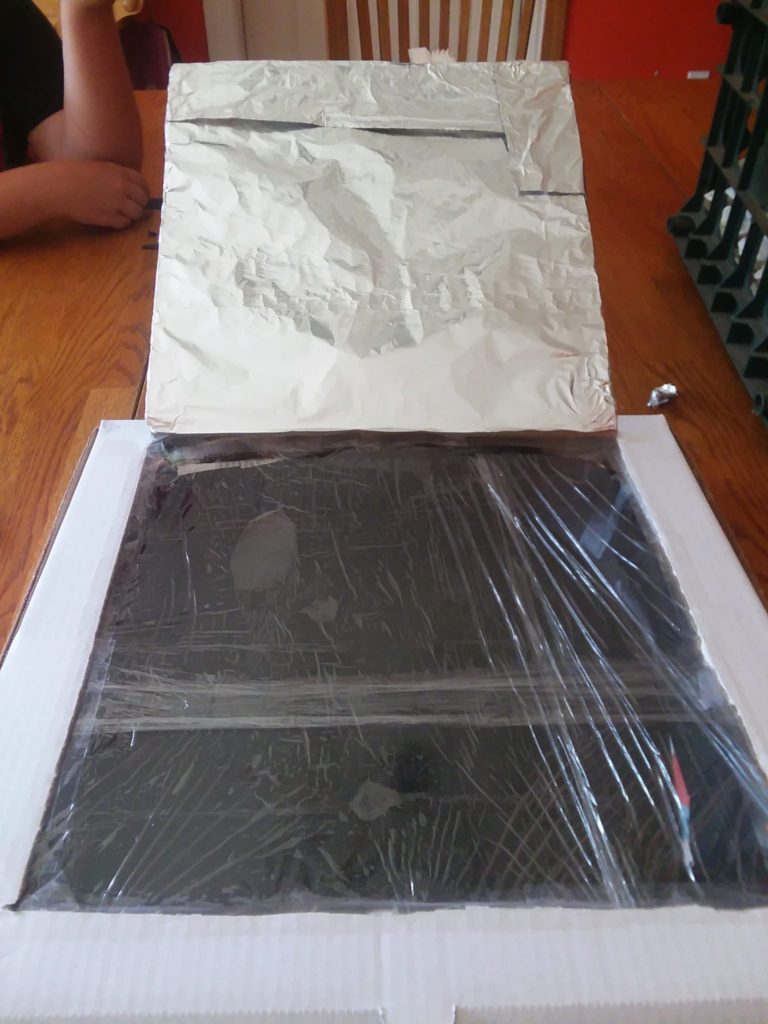
- Tape aluminum foil on the inside of the flap you just cut. This will reflect the sun into the box.
- Line the bottom of the pizza box with black paper. The black paper will help to absorb the heat. I taped it down with clear tape.
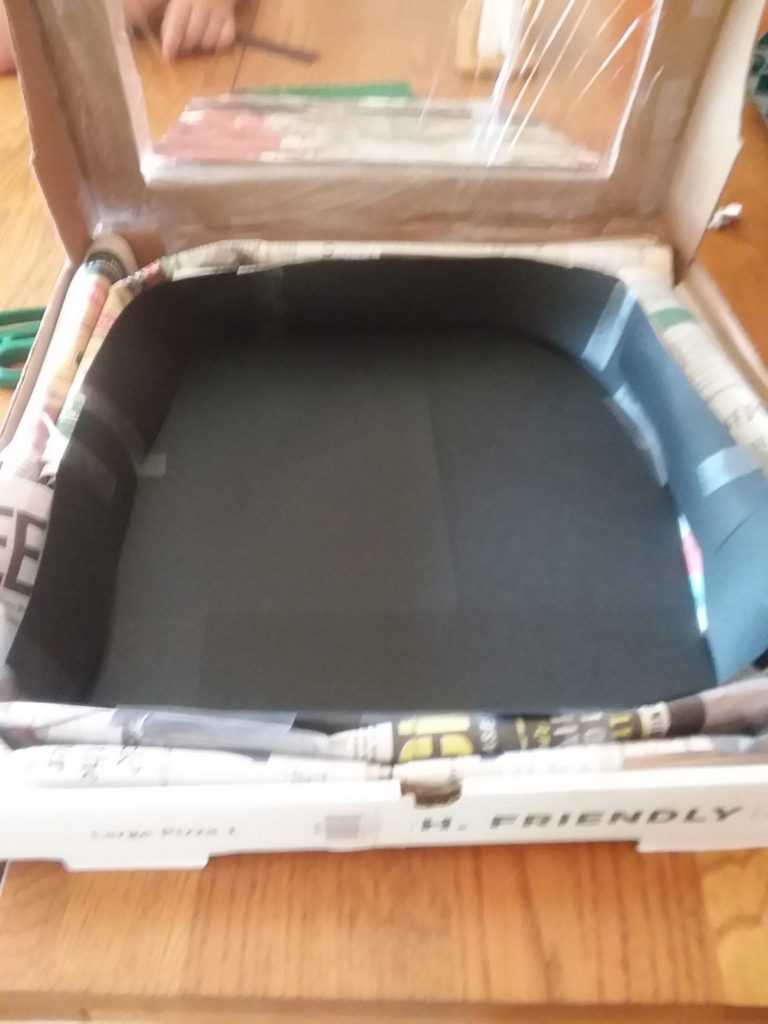
- Roll up newspapers and line the inside edge of the box with it. I taped the newspaper together with clear tape. The newspaper will help insulate the box.
- I decided to line the newspaper with black paper to add to the heat absorption. I taped it on the newspaper that was facing inside the box.
- Lastly, tape plastic wrap over the opening at the top of the box. It will help trap in the heat, so the food can cook. My daughter taped it on the inside. You may be better off taping it on top. When we taped it on the inside, it sagged into the box, and we needed to tape the upper part to hold it better.
- I cut a piece of cardboard from an old cereal box to make an arm to hold the top flap open. I secured it on with tape.
- You are ready to cook!
I found this design over at Home Science Tools. I adapted it some. For instance, they don’t use construction paper on the newspaper, but I chose to add this in.
Cooking the Pizza in the Solar Oven
My next step was to go searching for instructions on cooking a pizza in our solar oven. I found instructions at Playdough to Plato.
I will admit that I messed up from the beginning. We made pizza dough (you could buy it, too.) and rolled it out thin. I then placed it on a piece of circular cardboard covered with aluminum foil.
YOU MUST SPRAY WHATEVER YOU ARE PLACING THE DOUGH ON. At the very least cover it with oil. You need to flip your dough while it cooks. I didn’t and was unable to flip the dough. You NEED to flip the dough or it won’t cook evenly.
Once the dough is in the solar oven, place it somewhere nice and sunny. The best times are between 10-2 pm. As the dough cooks, flip it every 30 minutes AND check the positioning of the sun on your solar oven.
Once the dough is cooked, add the sauce and cheese. Let it cook in the sun until the cheese is melted…in theory.
I messed up. I didn’t grease the foil, so I couldn’t flip the dough. FOUR HOURS went by and the top of the dough was cooking but not underneath. I tried to flip it. It made a mess. I salvaged what I could and finished cooking inside.
LESSON LEARNED: Follow directions! If I had, I would think it would have worked.
Pizza Box Solar Oven S’mores
We decided to backpedal a little and do something easy in our solar oven…S’mores.
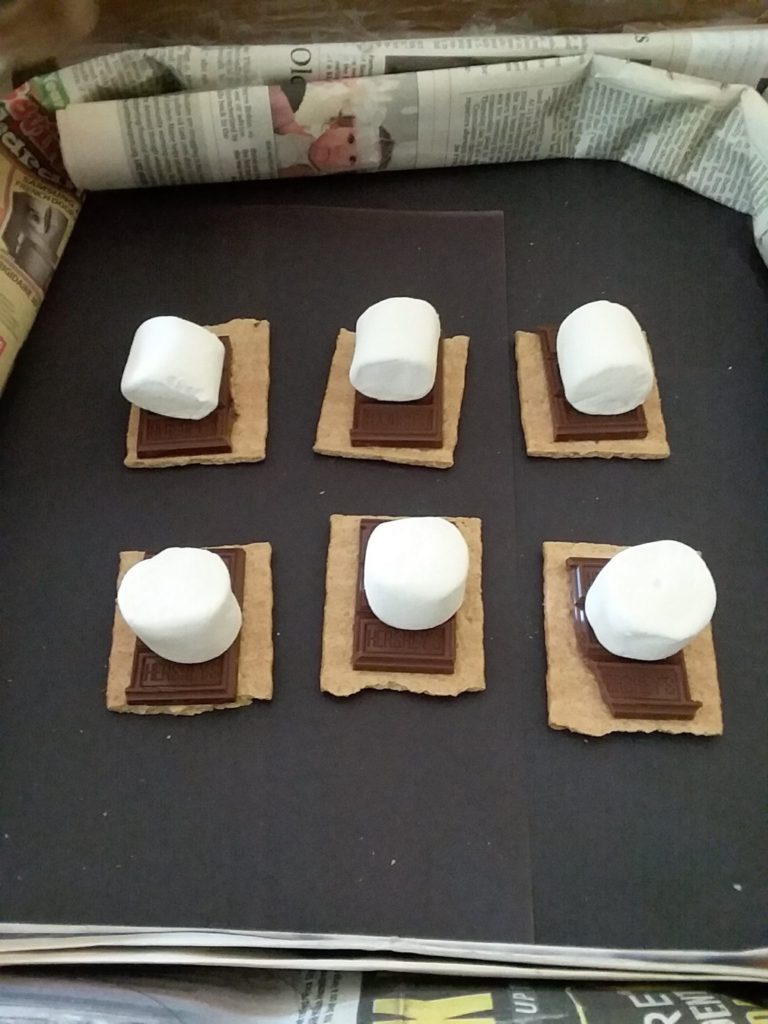
- Place a graham cracker square in the solar oven.
- Place a square of chocolate on top of the graham cracker.
- Place a marshmallow on top of the chocolate.
- Put the lid down on the solar oven.
- Put the solar oven in a sunny place to cook.
- Check on the S’mores every 30 minutes or so.
- They are done when the marshmallow is soft.
- Place a graham cracker on top and eat.
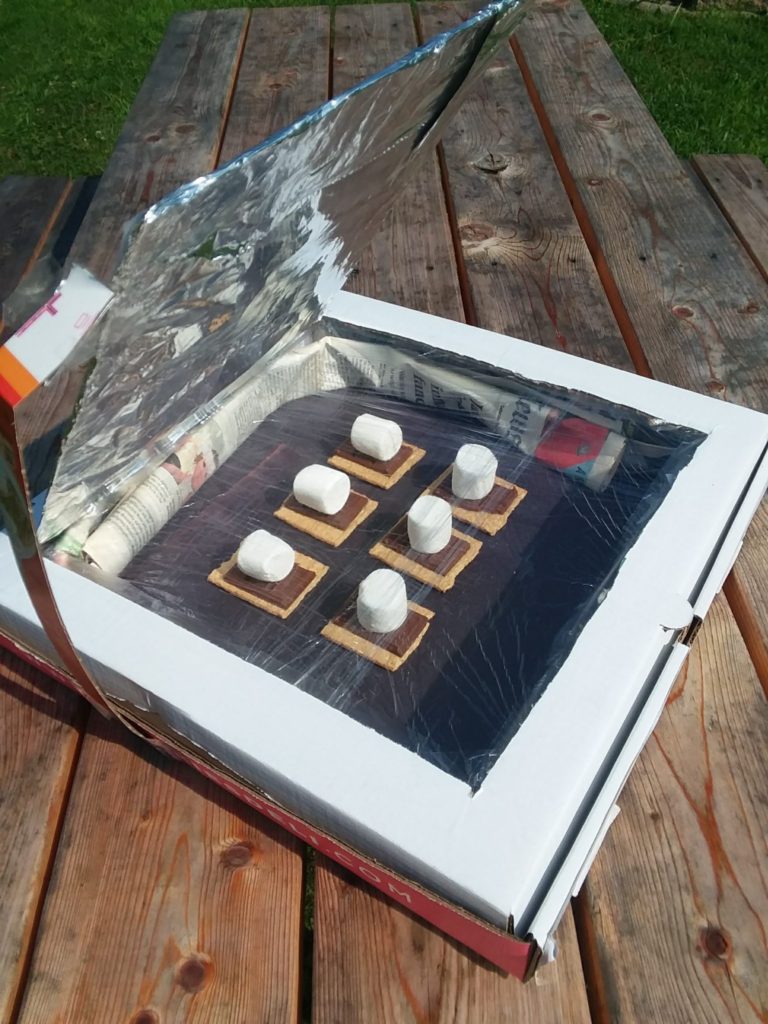
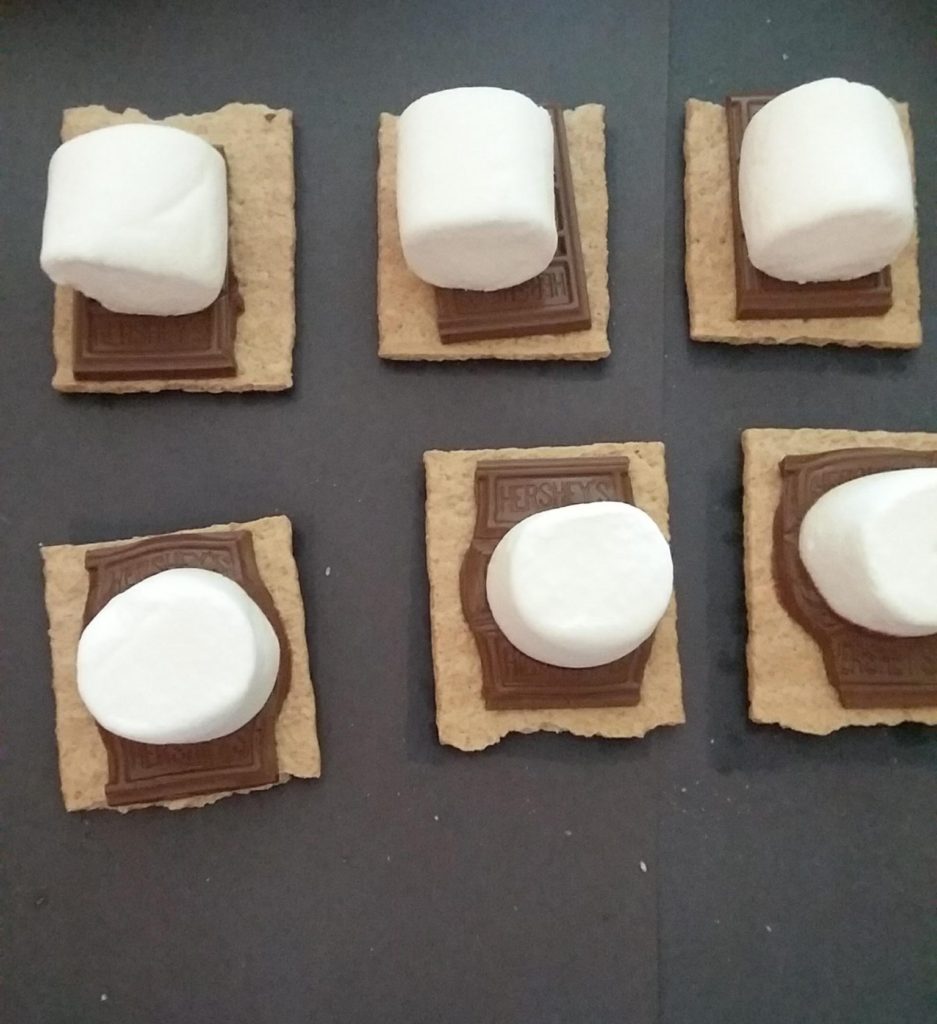
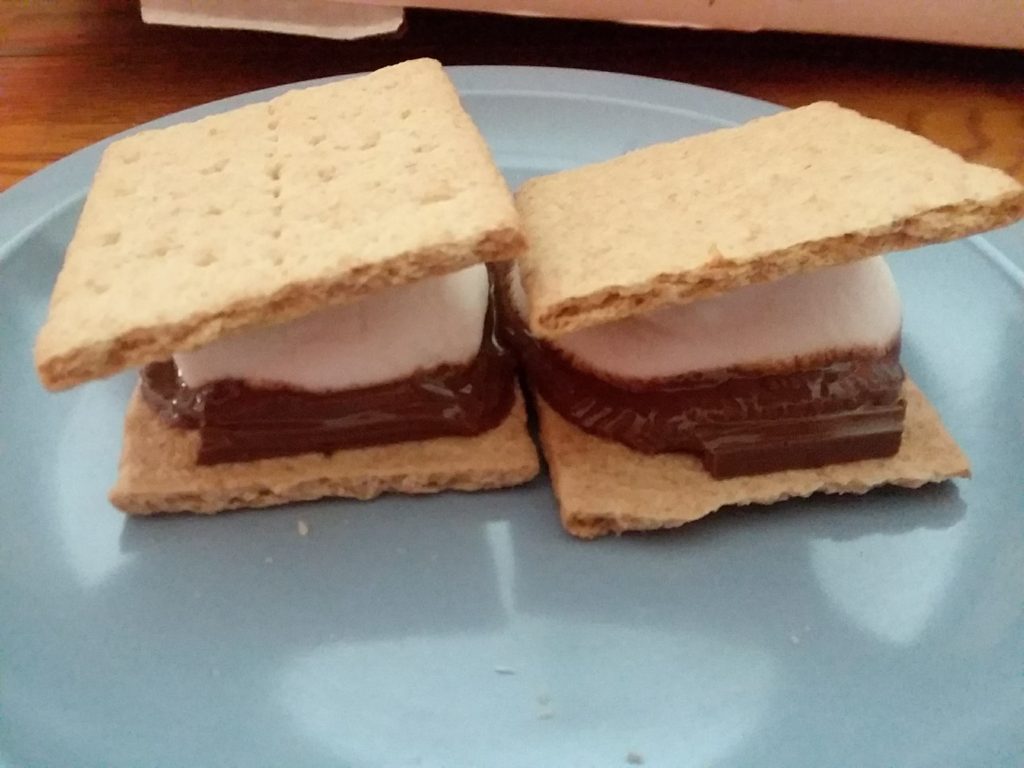
Our S’mores took about an hour to an hour and a half until the marshmallows were nice and soft. I was afraid my chocolate was going to be a puddle before the marshmallow was done, but it turned out perfect.
They were SOOO good.
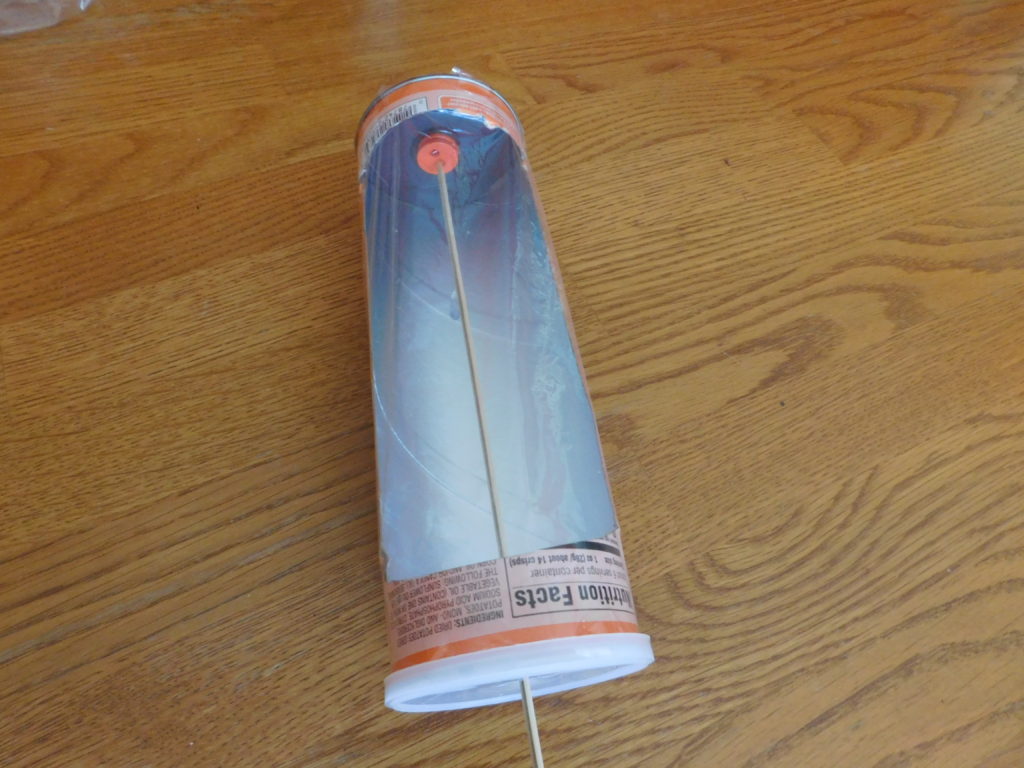
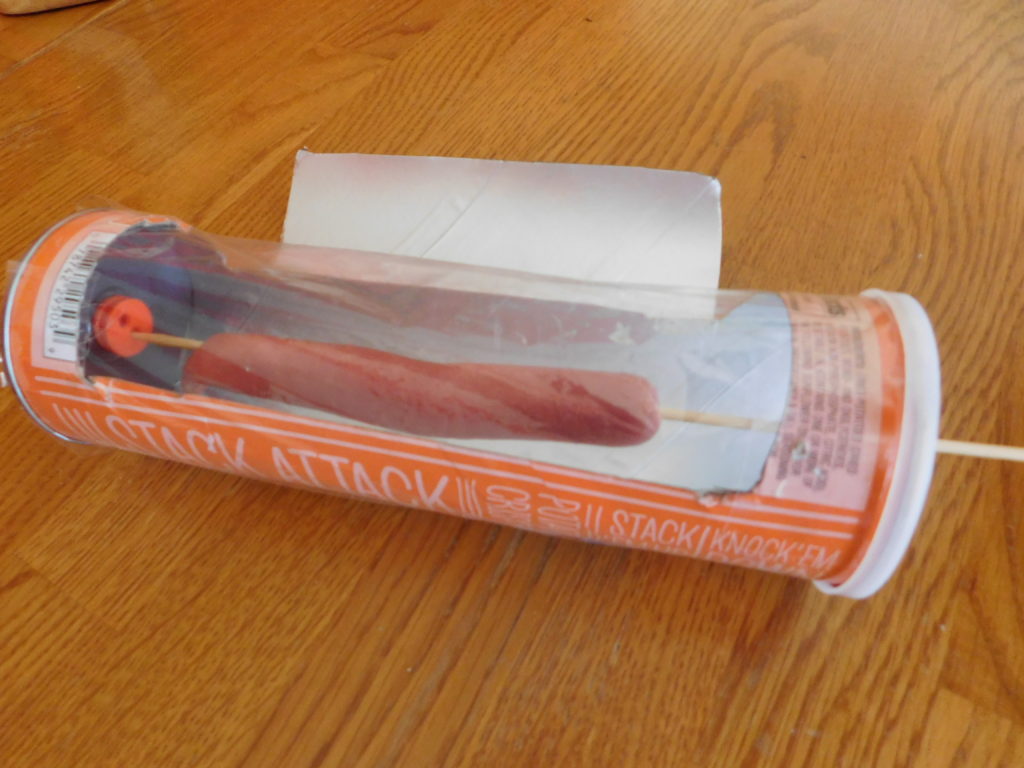
Hot Dog Solar Oven
Our last adventure with solar ovens was with a solar oven to cook hot dogs. They are simple to make with a Pringles-type container.
Materials:
- Pringles container or similar
- Scissors
- Plastic wrap
- Kabob skewer
- Clear tape
- Buttons (optional)
- Black paper (optional)
- Hot glue (optional)
- Drill (optional)
Directions:
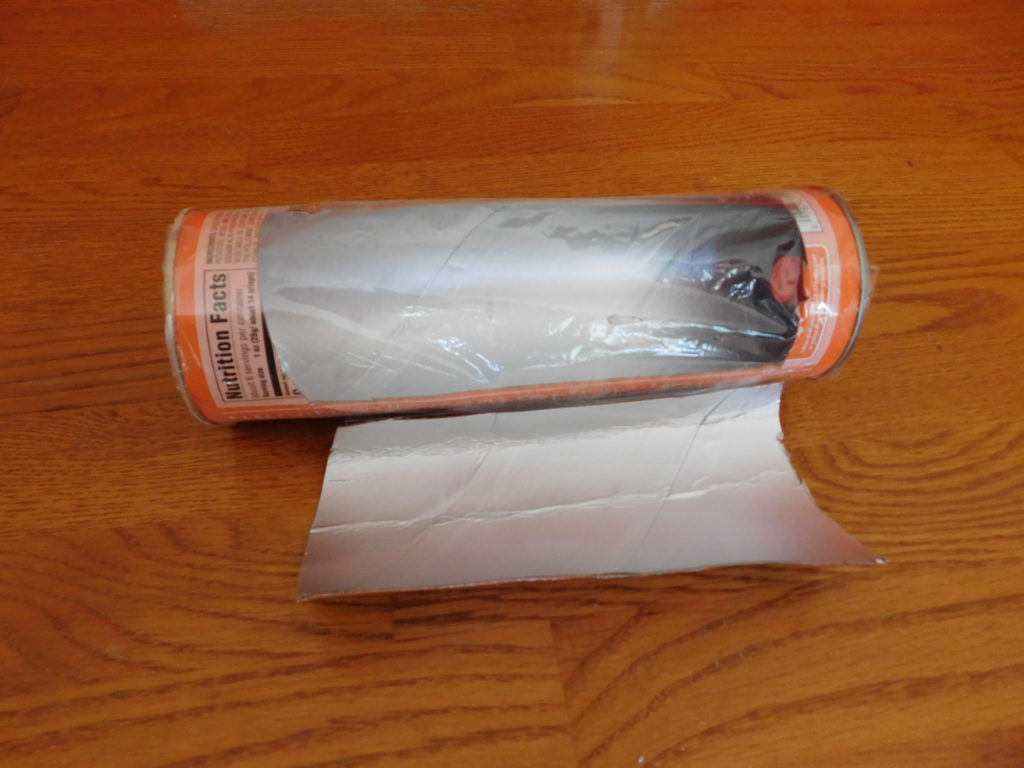
- Cut a window into the front of the container. You can cut it completely off and save the piece or cut it so to make just a flap where one side is still attached.
- Method ONE: Drill a small hole in the bottom of the container the skewer can fit through.
- Method Two (if you don’t have a drill): Cut a circle out of black paper and hot glue it inside the bottom of the container (it gives the buttons something better to stick to.). Then hot glue two or three buttons with holes together. Make sure not to glue the holes shut. Then glue the buttons on the paper at the bottom of the container. The skewer can now have something to rest on in the bottom of the can.
- Tape plastic over the hole in the side of the can. It will help trap the heat.
- Stick the skewer through the center of the plastic lid.
- Insert the skewer through the middle of the hot dog and stick it in the can.
- Make sure the end of the skewer goes through the drilled hole or rests in the holes of the buttons.
- Adjust the flap by the opening of the can or tape the piece you cut off to help reflect light into the container.
- Place the hot dog in the sun.
- Rotate the hot dog on the stick every 30 minutes.
- Cook until it is heated through.
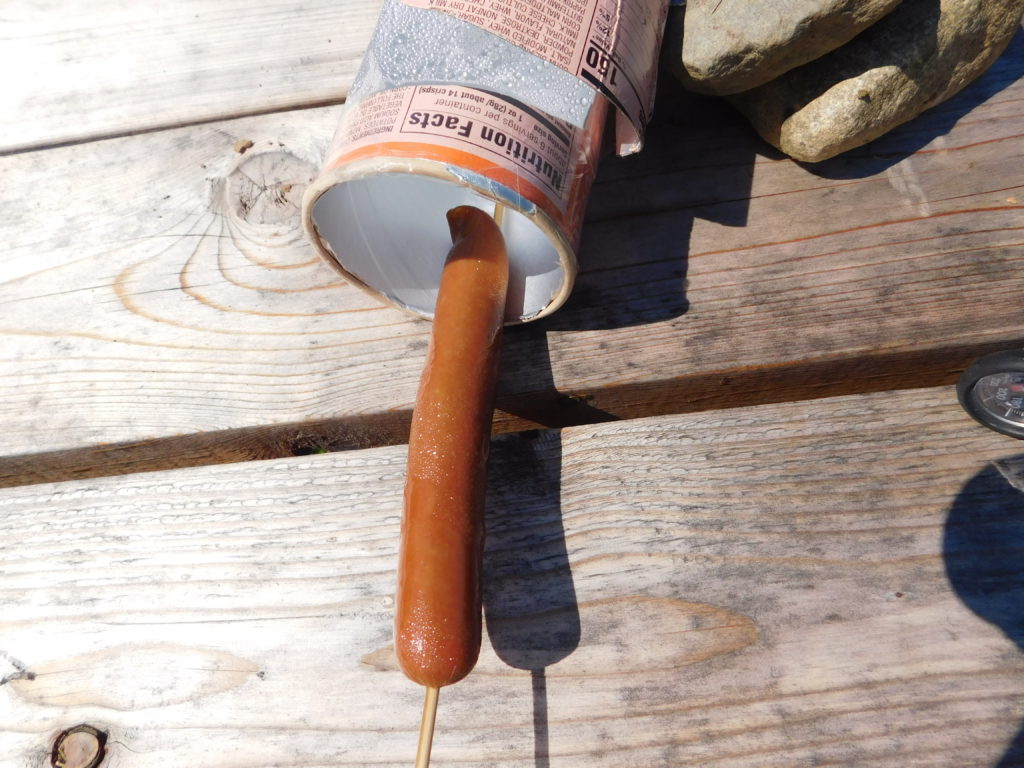
Our hot dog was in the sun for about 2 hours. It looked done. When we tasted it, it was heated all the way through.
Cooking with a solar oven cooking is fun. It takes time, but it is nice for kids to learn some new ways to cook. So start saving pizza boxes and Pringles cans and be ready for a sunny day! Your kids will be super excited to use the sun to cook their food. It is a pretty good science lesson along with some life skills.

What a great learning idea for cooking hot dogs! I am going to buy a couple cans of Pringles next time I am at the store so we can try this out!
I was very surprised it worked. It tasted pretty good, too.
After eyeballing pizza box solar ovens on Pinterest I dove in. We are having a hot spell here in the PNW- meaning it’s about 80 degrees. I lined a box with tinfoil. I tried making pizza crackers which was one of the Pinterest suggestions. I put some pasta sauce on some matza crackers I had. Then I grated a little cheese to cover the pasta sauce. After an hour the cheese was meltyish, but the cracker was soft and bendable. I ate the two crackers I made. They were tasty, but definitely not crunchy as I had expected. Then I decided to actually read some of the solar oven blog posts. Yours was very helpful! Thank you!
I’m glad it was helpful! Have fun.
I’m definitely going to do it. Thanks for the idea!
Have fun!