
We are a homeschool family. We have one income, and so we often find ways in which to save money. I think our kids can learn a lot from this. They learn ways to be more frugal and be less wasteful. In finding ways to save money, kids often learn other skills because of it. Here is where homemade yogurt comes in.
I have found that in trying to save money, the kids and I have ended up learning old fashioned skills like cooking. It is cheaper to cook from scratch than buying a package or something premade. Homemade yogurt is also cheaper when you make it from scratch.
You might also like Homemade Soft Baked Pretzels with Kids. Read it HERE.
So, let’s take a look at making yogurt from scratch.
Benefits of homemade yogurt:
- Inexpensive
- Tastes great
- Know the ingredients going into your food
- Flavor it how you want
- Make it as thick as you like
I’ve experimented over the past year or so. I love thick Greek yogurt and have found a way to make it how I like it. It is about $2 cheaper to make it myself than to buy my favorite brand in the store. I have expensive taste, ask my husband.
Negatives of homemade yogurt:
- Time
Homemade yogurt takes a lot of time. Not a lot of work just a lot of waiting around.
There are yogurt making machines out there, but honestly, I don’t want to spend money on another gadget taking up my cupboard space.
I also think it is a good idea for my kids to learn how to make things from scratch. I know I’m probably showing my age, but I feel we are becoming too reliant on technology to do things for us. And when it fails… People don’t know what to do.
I want my kids to be self-sufficient and not solely reliant on gadgets to do work for them. As you’ve probably guessed, I’m the mean mommy that doesn’t allow her kids to use calculators until they have mastered their facts and a particular concept.
Click HERE to read about other important skills kids learn about food.

Making Homemade Yogurt
Since homemade yogurt takes a long time, I make it at night. I do this because yogurt needs to sit for 8-12 hours. I let it do its thing while I sleep and finish the process in the morning.
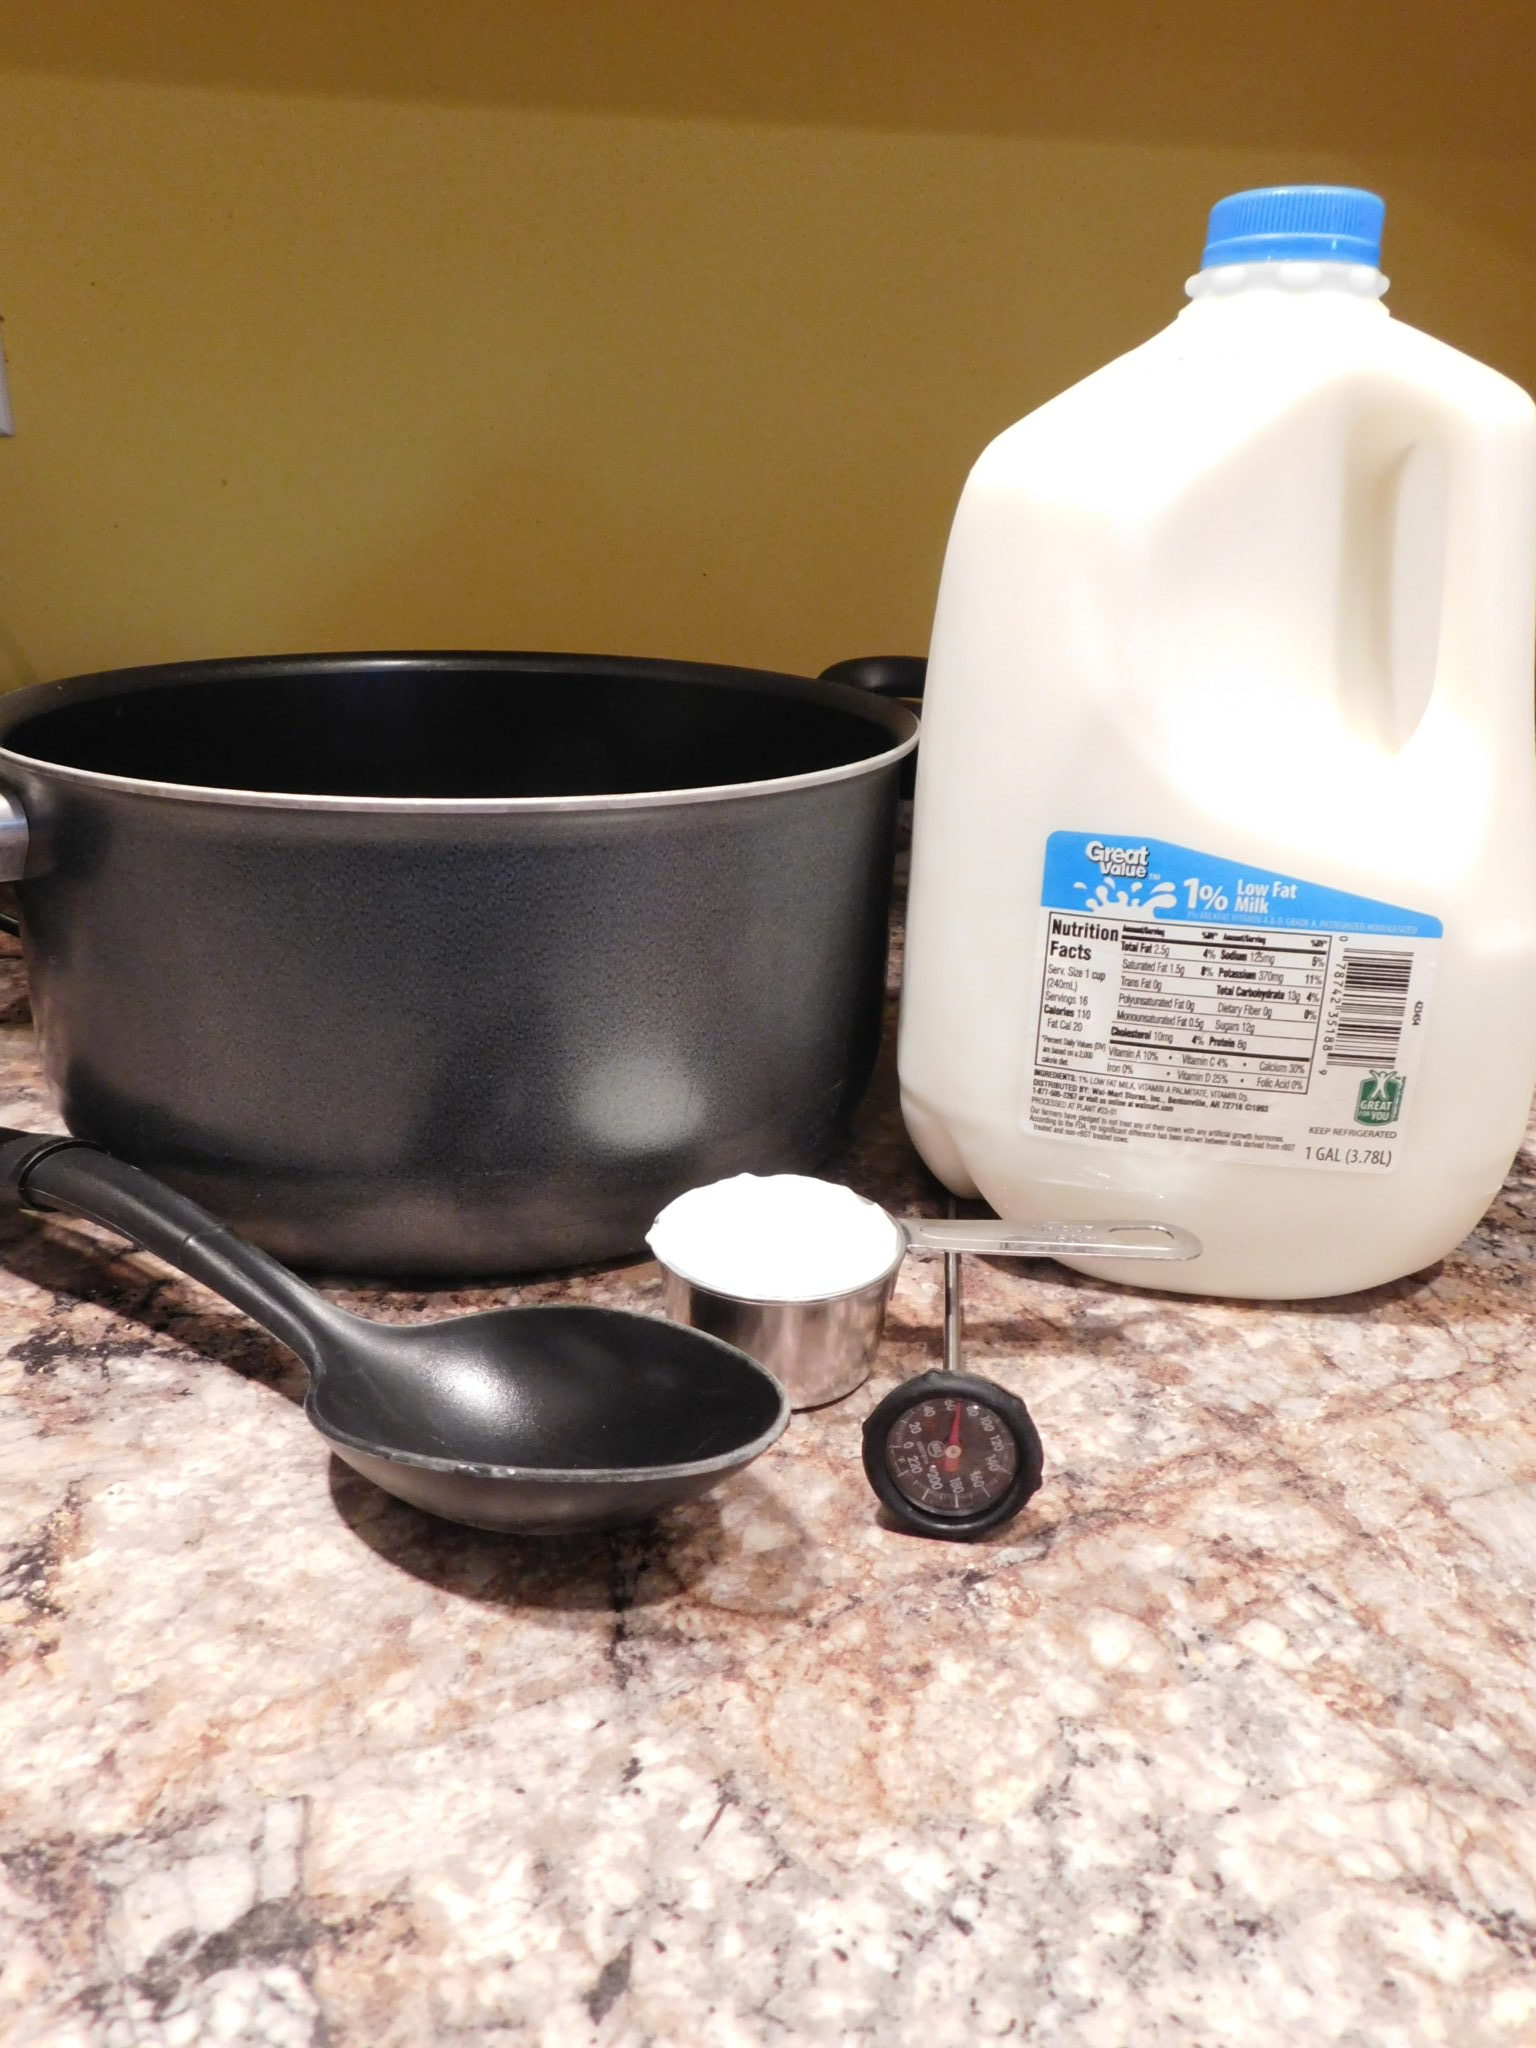
Ingredients:
- A Gallon of milk (skim, 1%, 2%, whole)
- 1/4 cup of plain yogurt with no artificial colors or ingredients (I use plain Fage because it is my favorite.)
Supplies:
- Large pot to hold a gallon of milk
- Spoon
- Thermometer
- Whisk
- Towels
- Cheesecloth or paper towels
- Large strainer
Step 1
Begin heating milk on the stove on medium heat until it reaches 175-180 degrees. You will want to stir it frequently.
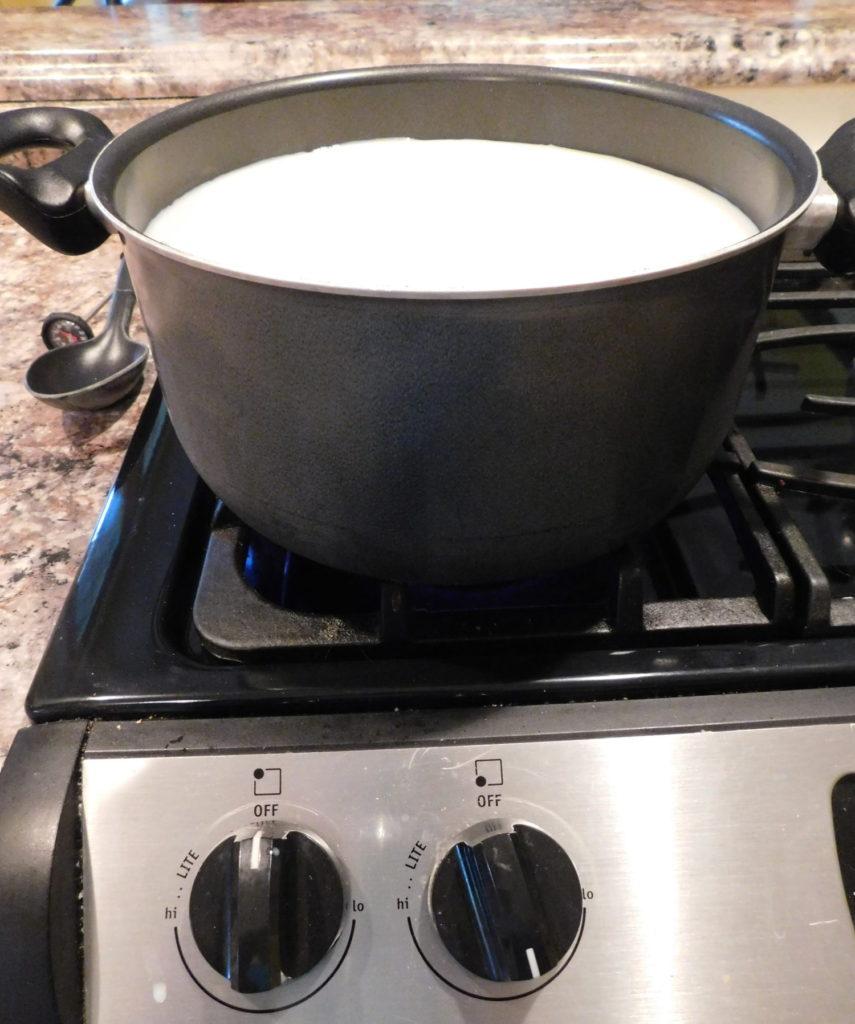
Some recipes will say heat on medium-high heat, but on my stove, the milk begins to scorch. Keep an eye on your milk and adjust the temperature accordingly.
If you notice the milk is beginning to scorch on the bottom of the pan, turn the heat down and DON’T stir the milk off the bottom. Gently stir.
Mixing the scorched milk into the rest of the milk will ruin the taste of your yogurt. I AM speaking from experience. The yogurt ended up a bitter taste. You can salvage it by gently stirring and making sure not to scrape the bottom. Also, once it is heated dump it in another bowl.
FYI: It takes me about 25 minutes to heat my milk to temperature. I bring it up to temperature slowly because I don’t want it to boil.

Step 2
Remove the milk from the heat and let it cool to 110-115 degrees.
You can leave it to cool on its own, OR you can fill the sink with cold water and place the pot in it to cool.
I let my milk cool on its own. It takes about 45 minutes. I do other things while it cools.
When I take my milk off the stove, I pour it in my crockpot bowl. Others have poured theirs in ceramic containers. I do this for two reasons.
- I’m afraid if there is any scorched milk on the bottom, it is going to mess up the taste.
- The crockpot dish is thick and will hold in the heat better.
Also note, a skin will form on top of the milk while it cools. Skim this off while it cools.
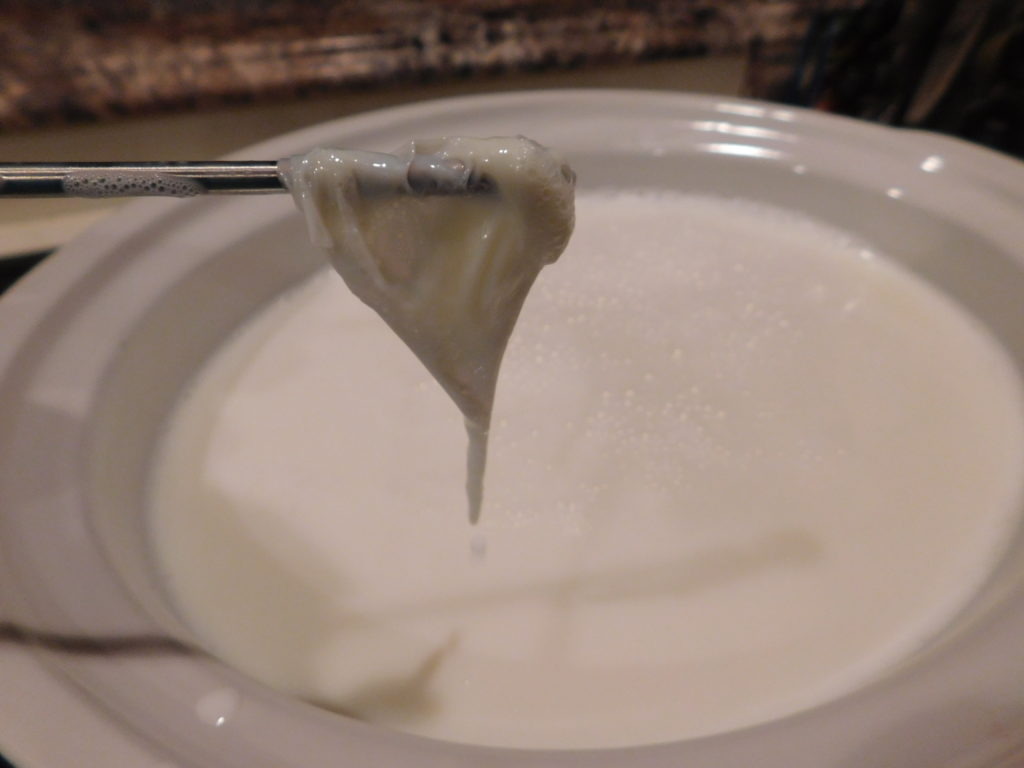
Step 3
Once the milk has reached 110-115 degrees, add 1/4 cup of plain yogurt to the milk. Whisk it in well.
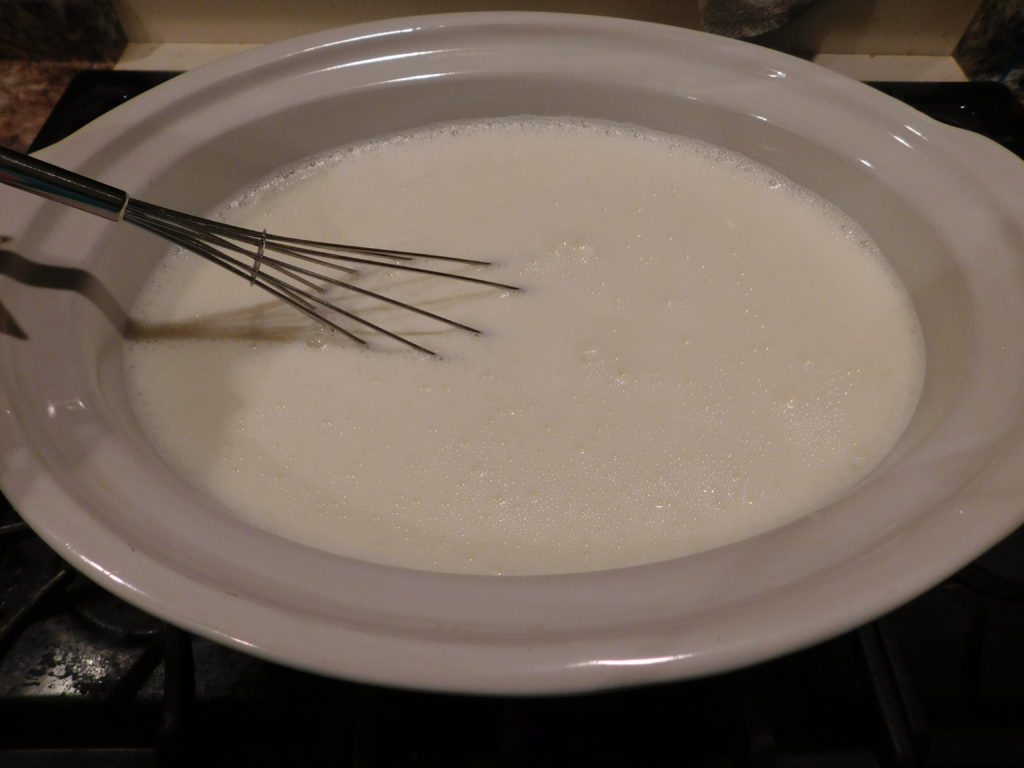
The yogurt you are adding is called the “starter”. It is adding in the bacteria you find in yogurt. After you have a batch of homemade yogurt, you can save some of it to use as a starter in your next batch.
Step 4
Now put the lid on your container and wrap it in a large towel and place it in the oven with the light ON.
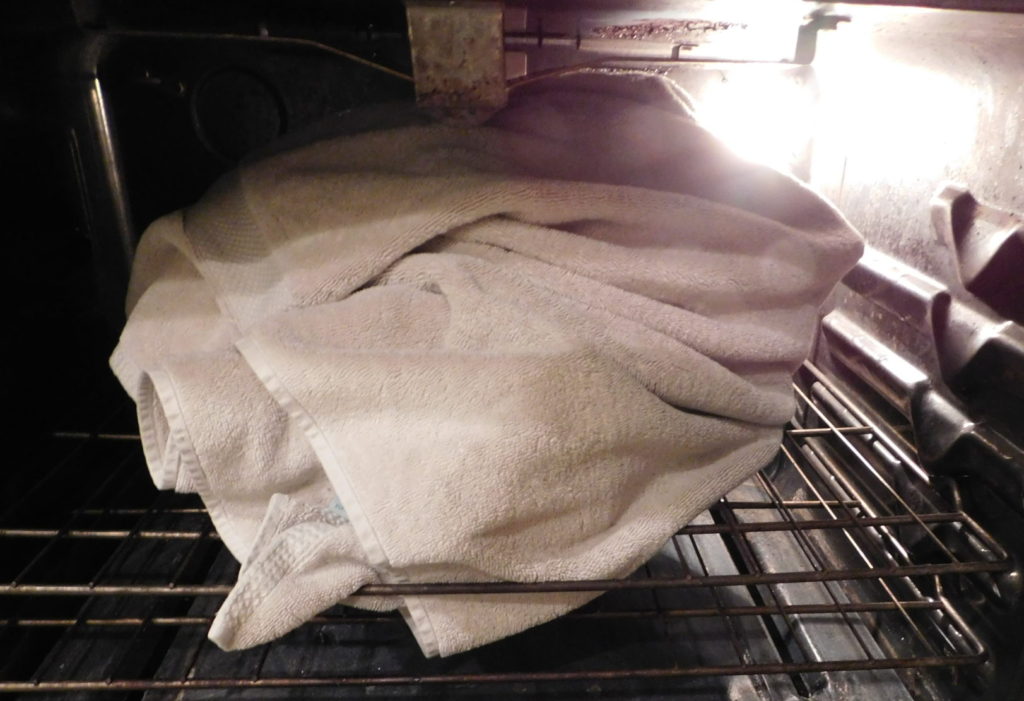
You want to keep your milk warm while it does its yogurt magic, somewhere in the 90s.
Some people pre-warm their oven slightly before putting the milk in the oven. Others do not.
I have done it both ways. I have started warming it slightly so the oven isn’t completely cold when putting the milk in.
Step 5
Let your milk sit in the oven for 8-12 hours.
I can’t think about this process too much, or I wouldn’t eat yogurt. I understand the science behind leaving the milk out to make yogurt, but my mind also tells me it is so wrong.
You will have to experiment to see what tastes best to you. I let my yogurt sit in the oven for 10 to 10 1/2 hours. It is perfect for our taste.
It also tends to be the amount of time it takes until I get around to it the next morning.
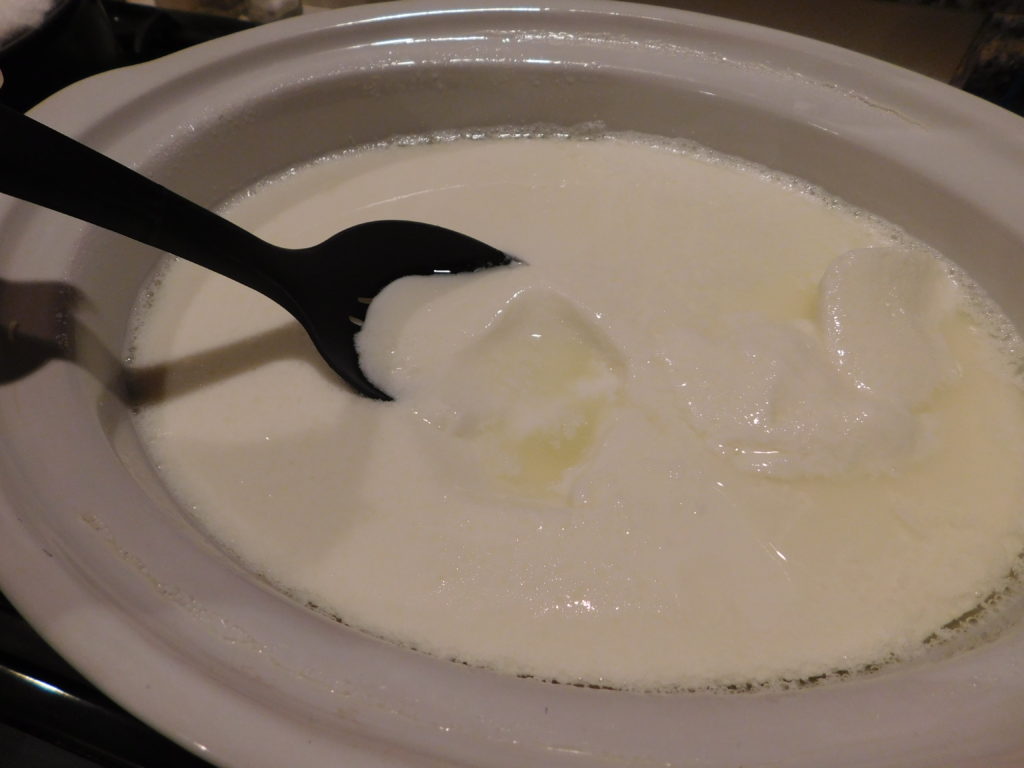
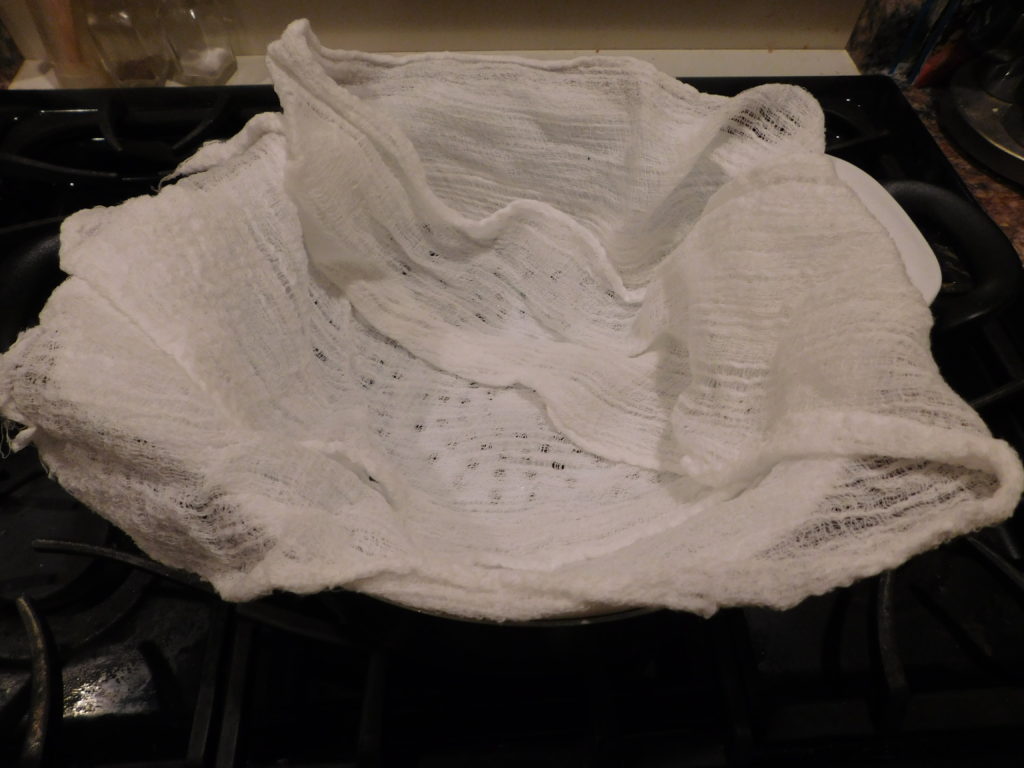
Step 6
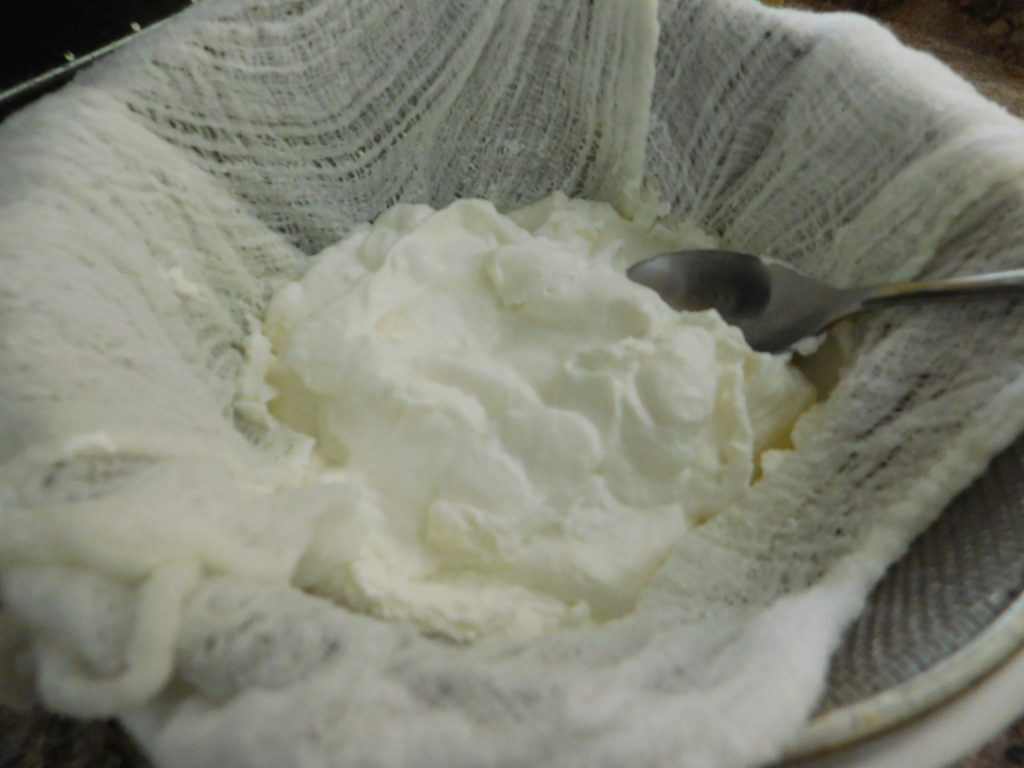
Strain the yogurt.
You will notice the whey on top of the yogurt. It is time to strain the whey until you get the right level of thickness.
Using cheesecloth or doubled-up paper towels, line a colander and place it in a large pot. The whey will strain through the cloth into the pot below.


I have so much I separate it into 2 bowls.

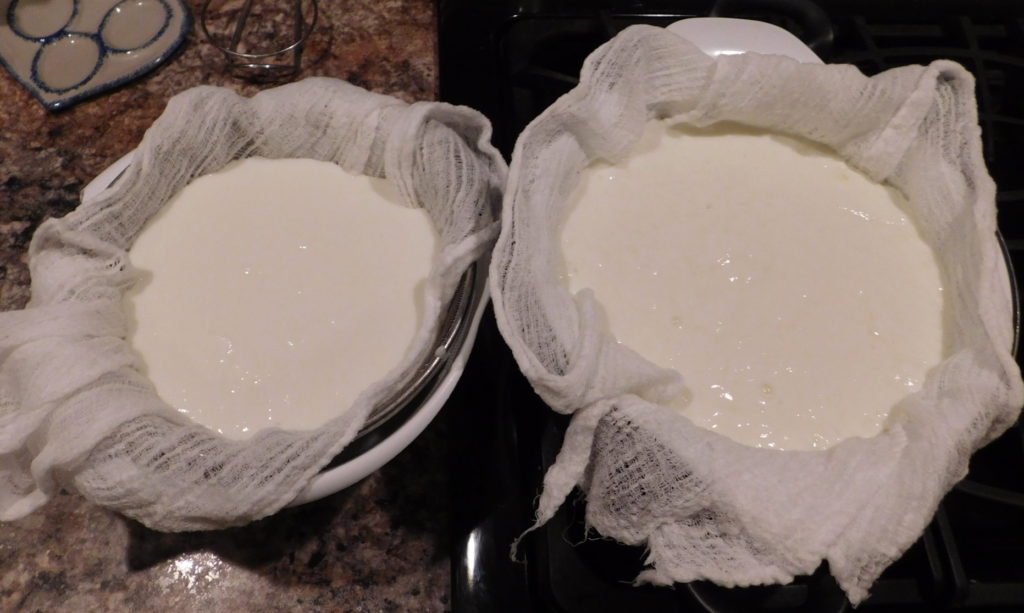
I put my pot in the refrigerator because I can’t take the idea of my yogurt sitting out any longer, and I let it drain. I check on it every hour. I dump the whey in another container when the pot gets full.
Note: The whey can be used in recipes that call for milk. It is a good source of calcium and has probiotics from the yogurt.
Keep straining the yogurt until you get the thickness you like. If you like thinner yogurt, you may only strain it a couple of hours. I LOVE, LOVE, LOVE Greek yogurt that is thick. I strain mine for about 2 or 4 hours. How long you strain it depends on how much is in the bowl. Smaller amounts are ready sooner.
Step 7
Stir your yogurt and store it in the fridge for a week to 10 days.
After straining the yogurt, I had 6 cups of yogurt to store. Not bad considering it cost less than $4 to make. The yogurt I normally buy is over $5 and only contains 4 cups of yogurt.
STEP 8
ENJOY!
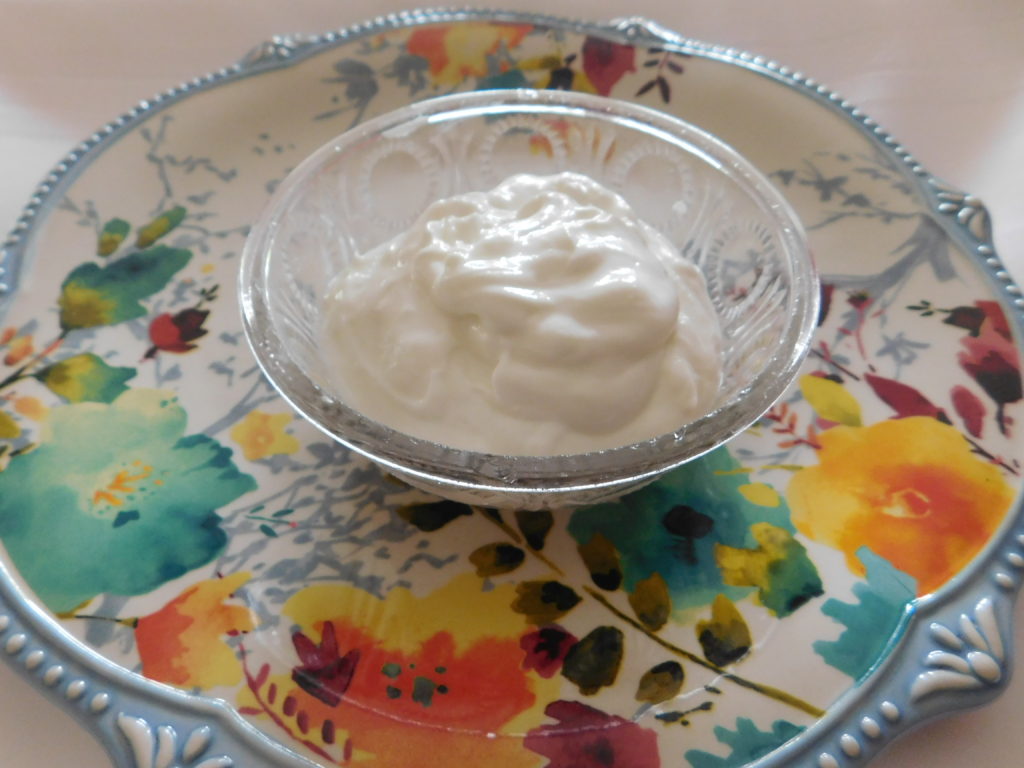
You can add vanilla extract, berries, cocoa powder and sweetener, and any flavoring you like to your yogurt.
NOTE: If you want to make a smaller batch, follow all the steps above but use 1 teaspoon of starter yogurt for each 1 quart of milk.
Final Thoughts on Yogurt Making
Making your own yogurt is yummy and inexpensive. It takes some time to make it, but it is a great skill for kids to learn.
Are there easier ways to make it?
Sure.
There are yogurt makers and ways to make it in an Instant Pot. It would be faster I am sure.
Why do I make it the hard way?
I don’t want another gadget, and it is good to know how to do something from scratch. You never know when it will come in handy.
Like other skills I make my kids learn, (you know- math facts, how to do long division, hand sewing) I do it so they understand how to do it without the assistance of a device or machine. They have the skill to fall back on in case they need it someday.

A warning, though, your kids may like the homemade yogurt better than the store-bought yogurt and want you to make it more. If that’s the case, I’m all for using the quicker/easier methods (just like with the calculator and bread machine). It’s good to know how to do it on your own first but then find a quicker way.
So get in the kitchen and try making some homemade yogurt with your kids. It is a great skill and one that is pretty handy when you are trying to save money.
If your kids like baking, click HERE to find more yummy treats your kids can make.